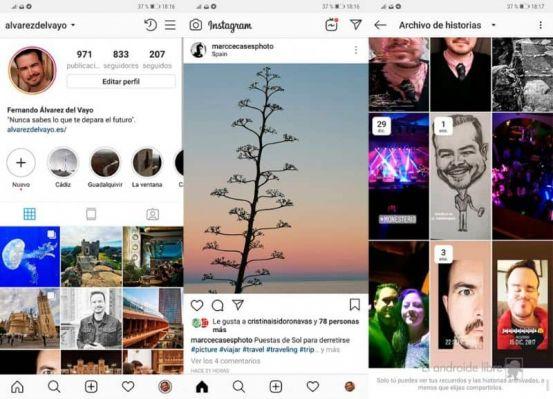
We will talk once again about one of the favorite social networks of many users, thanks to the fact that it has allowed the activation of many functions. And it's none other than Instagram, it was a social networks that didn't allow much interaction with his contacts, but now it's something else. But it is also a different reality when it comes to compatibility with other operating systems like Windows 10. That's why we present you an article that will explain step by step how to allow access to instagram microphone for windows 10.
How to allow access to the Instagram microphone for Windows 10" src="/images/posts/a9bdc45163db37c61ad8d4bd70bef1b2-0.jpg">
This is an option that can be activated very easily, but to be used by another application it can be a bit difficult to do if you don't know how. That is why these tutorials were born, which will show you what to do and how to do it, so that this work is really a lot easy to do.
It is necessary that in order to allow access to the Instagram microphone for Windows 10, you set up from the same application. This way you can use this device without any problems. Below we detail the steps you need to follow so that you can log in without any hassle.
How to allow access to the Instagram microphone for Windows 10
allow access to the Instagram microphone for Windows 10, you need to perform the next step. First you need to go to the Instagram application, if you don't have it yet, you can buy it by going to the Microsoft store. Once the App has been downloaded and installed, the session will open.
Once this is done, we will go to the direct message icon located at the top right. Here we will find all our contacts and we will choose to open a chat, when we enter one, we will go to the bottom left. Here we will find the icon of a camera and we'll make a clip.
By making a clip in this option, we will be able to send photos and videos, but in this way we are asked for permissions to allow access in order to take photos and record videos. In this case we need to create a clip in the Allow access to microphone option. Clicking on this option takes you to another window with different configuration options.
In our case we will select the Customization option, for this we select and create a clip. Doing so will take us to another window and here we will see that there are left and right options. In our case we will go to the left side of the screen and select the Microphone option.
Allow access to the Instagram microphone
When you do that, the microphone settings options will appear on the right side, on this side you will find the Instagram application. When you find it, go to the right side of it and you will activate the button. You will do it in the following way, you position yourself with the cursor on it and slide it to the right, this way it will be activated.
Now you need to do the same with the camera, in this same window go to the left and select the Camera option. You will do this by creating a clip on this option, when you do this, the camera adjustment options will appear on the right side. And likewise, you will seek the Instagram app and you will activate this feature to allow access to the camera as well.
How to allow access to the Instagram microphone for Windows 10" src="/images/posts/a9bdc45163db37c61ad8d4bd70bef1b2-1.jpg">
Check that it has switched from deactivated to activated and in this way you open two activated functions that are very useful when you use your social networks like Instagram. And that's all you need to do for allow access to the Instagram microphone for Windows 10. In a very simple way so that you can use the trendy social network.