


When it comes to screen issues in Windows, the list is certainly quite long. In fact, one of the most common is the blue screen in Windows 10 which has multiple causes.
My screen color changed in Windows 10 - why is this happening?
This type of problem is usually common in some computers, it is usually a problem with your computer's graphics card or graphics chip, it is also due to an outage in the drivers, but when this happens, it is a warning that our computer is starting to fail, which is why it is best to review it and then rule out any possibility.
It is possible to solve this problem, although different problems may continue to appear, such as constant automatic restarts or just that the computer shuts down for no reason.
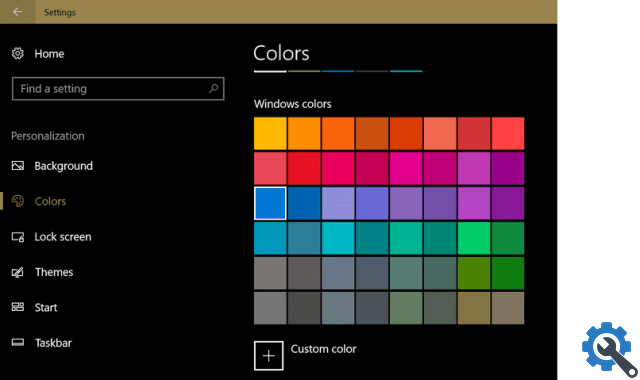
How to fix and restore the colors of my Windows 10 PC?
There are several details that make the difference between a quality computer and one that does not have one. And one of these factors is the screen color of a computer, in fact there are cases where some games appear blurry on the computer, which could be due to a failure on the screen.
And it's understandable, since color is what gives life to everything we do on the computer. Also, if we want to print something from our computer, color is essential to make a good impression.
But sometimes there may be some problems in the settings of the color on the screen of our Windows 10 PC. The screen may be seen too blue, green, yellow or red. If this is the case for you, don't worry, because here we will provide you with the help you need to solve this problem quickly and easily.

Steps to restore screen colors in Windows 10
While this can be a very annoying problem, you will surely be happy to know that it has a very simple solution. Everything can be solved thanks to the useful color manager available to Windows 10. Before starting, we recommend that you update and install the latest version of DirectX, which is very useful for solving this type of problem.
In order to set the color of your PC to correct and restore colors of your Windows 10 PC screen, all you have is:
- Access the control panel of your Windows 10 PC.
- There, find the "Color Manager" and open it.
- Go directly to the tab called "Advanced Options".
- When you see all the color values that can be set there, change them all to your default value.
- To finish, click on the “Calibrate” button.
That's all! Once you've done all of this, your Windows 10 PC screen colors will look better than ever. Thanks to all these steps, he will be able to have true quality colors. Something you need to remember is that the color configuration differs depending on the user, everyone can choose how they want to configure the colors.
But if you want new users to have the same color settings, all you have to do is hit the button that says “Change system defaults”. Therefore, each new user on the PC will have that set of values.
How else is there to fix and restore the colors of a Windows 10 PC?
The above is the most common and accessible way to fix and restore Windows 10 PC screen colors, but there is still another way to get it easily.
Another way to configure the colors of a Windows 10 computer is with an Nvidia graphics card. If your computer has one of these cards, it is very easy to perform this procedure through it. All you need to do is open the NVIDIA Control Panel in Windows 10 to reset the screen colors to their default settings.
You can access it from the taskbar. Then, we click on the “Display” option and go to the section "Nvidia configuration". There, you can configure the colors to your liking or you can leave them as they have been set by default.

We also recommend that if you have any questions or problems with this procedure, you should go to the official Microsoft Support page. This way you will get the help you need and when you need it.
We hope that all of this information will be useful to you and that you can make your Windows 10 PC have colors of real quality in a way quick and easy.
How to perform screen calibration using the built-in tool?
As most of us know, the Windows 10 operating system has a built-in tool that it is used for the calibration process of our computer screen, as there is nothing better than keeping the colors in place in order to get a better view and better use of the device or computer, but how is it used? This method is quite simple and practical, we just need to do the following:
- Mainly, we have to open our “calibration tool” on our Windows 10 computer, to do this, we can right click on the screen and once done, we select the option that says “display settings”.
- So, entering, we have to scroll down, almost to the end, and we will observe the option of "advanced screen configuration".
- Next, we will click on “show display adapter properties”.
- Immediately, we must enter the color management tab on the screen and click "color management".
- When the color management tab has already been opened, we need to click on the option that indicates “advanced options”.
- Next, we click on “calibrate screen”.
- When we do that, a tab pops up quickly, which is it calibration tool of color for the screen itself, here we will also see a pop-up warning indicating that we need to restore factory settings on the monitor.
- We then begin to adjust the “gamma” value, thus adjusting the brightness, with the bars to be calibrated that will appear on the screen.
- Also, if we wish, we can adjust the contrast and we'll see if that's what we want at first glance, the idea of adjust or calibrate the colors on our Windows 10 computer is that the colors are similar to those we perceive with our sight, that is, we are not shown an opaque or unknown color to our eyes.
- When we have completed the color calibration, we can compare the current calibration with the previous calibration.
- And so, we would have our screen calibrated to our liking.
How to adjust graphic values to default settings?
We may want to do this at some point on our computer and of course it is totally possible to adjust the values to the default values e , above all, the process is super simple, we just have to follow the following steps:
- First we have to click with the "right button" of our mouse or mouse on the desktop of our screen.
- Next, we select the option that indicates "graphic properties".
- And finally we click on the option that is presented to us and it says “restore default values”.
By completing these steps, we would have ready on our process of adjusting the values of these graphs.


