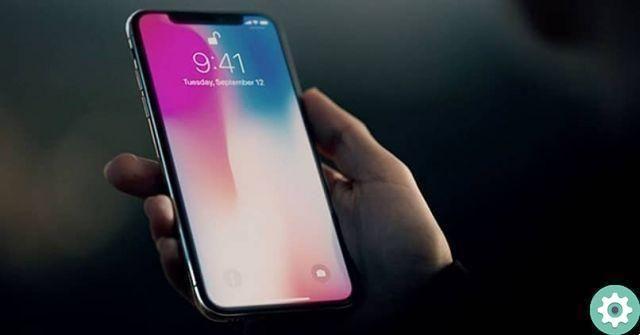
The iPhone X is arguably Apple's most iconic phone since the iPhone came out. The switch to FaceID, its full screen and its more than competent hardware means that it continues to be a widely used and perfectly valid model even today.
Released in September 2017, five years later it is still updated with the latest version of the operating system, iOS 14.
What is the iPhone X screen like?

The iPhone X display is 4-inch OLED Super Retina HD5,8, which supports HDR (High Dynamic Range) images. It also includes True Tone technology (which has been implemented in other products from the company, such as the iPad Pro) and its maximum brightness is 625 cd / m².
The Face ID unlocking system, first introduced in this model, replaced the Touch ID, surprising the market.
Face ID works through an infrared camera that reads an invisible pattern that is emitted by a 30.000-dot projector on the user's face, creating a unique facial map, capturing an image of the face.
The reading is then sent to the secure element (Secure Enclave) of the A11 Bionic chip to compare the user's face with that stored in that secure element.
It has security measures that prevent the system from being deceived by third parties, such as not working if it detects that your eyes are closed or if it is not looking directly at the device.
If you want to know more features of iPhone X screen, you can read this Apple support document on A1865, A1901, A1902 models.
How to replace the iPhone X screen?
For all these reasons, iPhone X users are still thrilled with their purchase, despite the fact that, in its day, its launch caused a little scandal due to its price. When it went on sale on November 3, 2017, the base model (64GB) cost € 1.159, while the higher version (256GB) cost € 1.329.
This explains why iPhone X users are willing to spend money on repairs to continue using a phone that still works flawlessly five years after its launch.
While user replacement of parts of Apple devices isn't something Apple favors, it's not overly difficult and you can do it perfectly at home.
Obviously the screws that Apple uses are of a special type that does not correspond to those we usually use (flat or star). They are called pentalobes, and you will need to purchase them at a hardware store that has this type of material for technological devices or via the internet.
Note that if you've purchased a second-hand iPhone X, this will remove any warranties you might qualify for.
These are the steps you need to follow. To facilitate your progress, we will divide it into two parts, until the screen is separated from the body of the iPhone and the pieces that need to be removed from the screen in order to replace it with a new one:

Part 1
- Turn off the device and remove the two 6,9mm long pentalobe screws from the bottom of the iPhone chassis.
- If you are going to change the screen because it has been broken, place masking tape all over the front of the screen to prevent it from peeling off and you can cut yourself (or fall inside the device itself)
- The screen has an adhesive underneath which provides extra support. In order to remove it, you will need to pre-heat the bottom of the screen with a hair dryer (or similar) for one minute so that the adhesive softens.
- Attach a suction cup to the bottom of the screen so you can slowly lift it.
- After you've successfully lifted the screen, insert something in the middle (like a guitar pick or thin knife to keep it from closing again. If it's still too hard, use the dryer on the bottom again to soften the screen). and gently force the screen upward to check that it softens.
- Using the pick or knife, slide it to the lower left corner to cut the adhesive.
- When you have reached the left corner, go back and do the same with the right corner (be sure to insert the pickaxe or knife as little as possible as you may break the internal connectors, leaving the iPhone unusable)
- Once the corners are free, slowly walk along both sides to detach the screen.
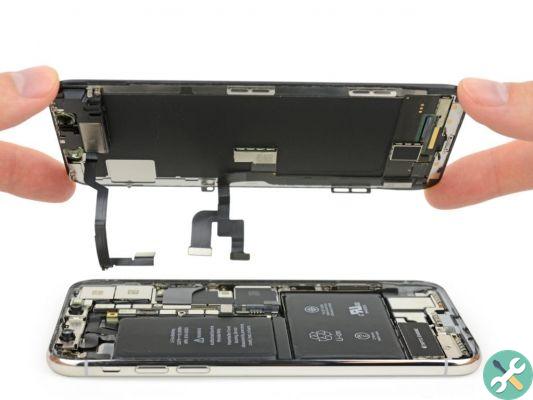
- When you have completed the perimeter, try opening the iPhone screen using the left side as the axis, until it is at a right angle. Remember that there are still very thin cables connecting the screen to the motherboard, so if you separate the screen completely they will break.
- Remove the five Y000 screws securing the connector to the logic board and remove the connector.
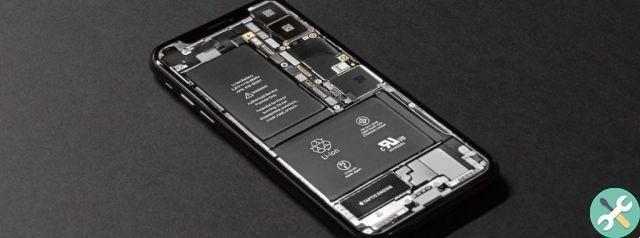
- Lift the battery connector up and bend it to make sure it doesn't touch the card and supply power to the phone while you repair it.
- Disconnect the sensor connector from the front panel.
- Disconnect the OLED panel connector.
- Remove the digitizer cable from its socket (it is very sensitive when you place it. Do this gently first on one side and then on the other, and you must notice that it fits naturally. okay)
- Lift the front panel sensor assembly cable until the adhesive peels off.
- Separate the screen from the device body. Now you need to release some pieces that are attached to the screen.
Part 2
- To remove the speaker and headphone sensor, remove the Y000 screw (near the infrared camera)
- Remove the grounding clip under the speaker.
- Remove the two Y000 screws holding the speaker
- Gently pry to disconnect speaker (has light adhesive)
- Use the dryer on top of the screen again to soften the glue on the sensors
- Detach the microphone taking care not to damage the cable
- Permanently (carefully) separate the flexible cable and the proximity sensor + module.
- Detach the ambient light sensor (carefully because it is attached by a very thin wire)
- Remove the speakerphone and the front sensor.
It is done. You already have the free screen and you need to reassemble all the modules you removed in the new one.
Conclusion
Despite being nearly thirty paces, reading it seems much more difficult than it actually is. Above all, you need patience, nerve and time to be able to do it with all your attention.
Ultimately, it's about getting your beloved iPhone X back in perfect condition and that it can continue to be useful for many years to come.
So it's worth it. Do not?


![Google also wants your Apple News [Updated] [2]](/images/posts/943dc0d8f28fcc4bc16fa30ed6d71f6a-0.jpg)


![Apple Vice Presidents Talk About Development of M1 for Mac [Updated]](/images/posts/c6254b668e5b3884d6b6338ccb8a02ff-0.jpg)