


The reality is that in both the header and footer there are options for visitors that improve your page. They also affect yours positioning on website, because depending on the customization that these two elements have, it will be much easier for the Google search engines to find you.
Knowing these important aspects, let's see below the steps to follow to change the header and footer in WordPress.
Steps to edit the header in WordPress
As we quote the header in WordPress plays a fundamental role, first of all because, among other things, it must contain a menu with different categories, to facilitate users' search. On the other hand, it must have an image, which is what Google will rank with its search engines when users search for content.
One of the many advantages of the designing a website with WordPress is that it already offers a number of themes that you can customize. In this way, the steps you need to follow to change the header in WordPress are as follows:
- Enter your WordPress page as usual.
- In the left sidebar select "Appearance".
- Click on «Themes» and choose the one you prefer and assign it «Activate».
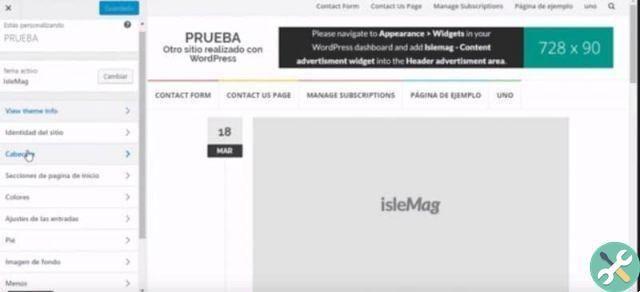
- Once activated, some options will appear in the left sidebar of your WordPress and you will need to click on "Customize".
- Then you have to press «Header».
- Once inside, click on the "Top header bar" option, select "Social icons" and choose the one you want.
- Then go back and select "Header content", then "Choose logo" and select the one you like.
- Next, enter "Header Slider" and indicate how many sliders you want to have per category.
- Now, enter "Widget" and edit "Header Ad Slot" and enter the text you want it to have and click "Save".
- Then go to «Menu» and select the menu you want at the top and the main one and that's it.
Have you already realized that edit the header in WordPress it's very simple, now you know how to customize the footer.
Steps to edit footer in WordPress
Know how to change the header in WordPress, change the footer it will make it easier for you, as the steps are very similar. Just follow the instructions below to the letter and you will see how quickly you will have customized your footer:
- Enter your WordPress as you normally do.
- In the left sidebar of WordPress select "Appearance", then click on Templates or "Themes" and select one.
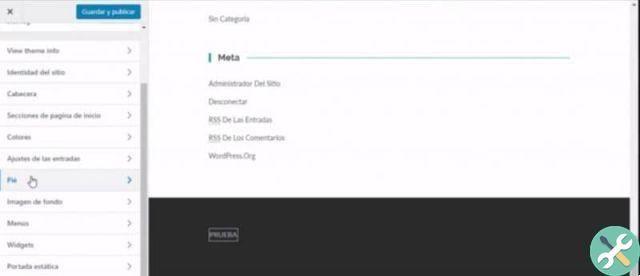
- Next, enter "Customize" and click on «Pie».
- Press «Select image» to add the logo in the footer.
- In «Link to the footer logo» write a link which, if pressed, takes you to the top of your page.
- In the "Footer content" option type what you want to be shown.
- Then in the option «Social network title» add the social networks of your page.
- In the "menu" option, select the menu you want for your footer, give it "Save" and that's it.
By doing this, you will have already edited the footer in WordPress, the important thing is that you follow the steps we have mentioned. How you can view both the header and footer edition will depend on what you want to see.
What, if necessary, as we said at the beginning is that your web page contains these two aspects, as they will allow you to position yourself in Google. Likewise, you will make it easier for your visitors to search for content, which will make them enter more frequently.
If this information has helped you, do not hesitate to continue reading our blog, you might also be interested in: How to put or insert a Slider in WordPress in minutes.
TagsWordPress


