


Microsoft Publisher is an application that allows you to create and design newsletters, labels, brochures, calendars, postcards, greeting cards, resume, banners, diplomas, business forms and insignia. Once your creations are ready you can print or reproduce them.
With Publisher you can do amazing things, as its tools and features will facilitate the development process. Also, you can realize banner very beautiful and creative.
What is a banner?
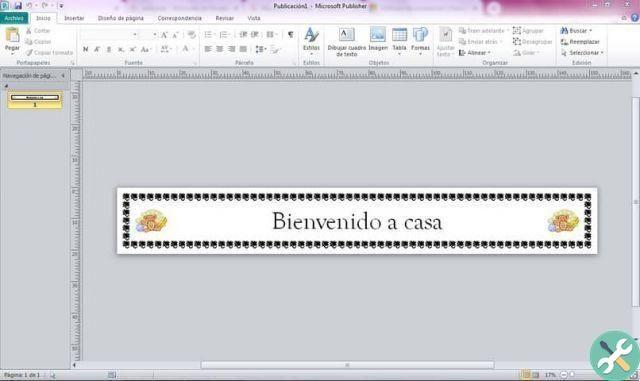
A banner is a poster with which you can make propaganda or information something important, has lettering or illustrations. Also, you can use a banner like un welcome gift, birthday or anniversary gift.
Microsoft Publisher offers you a million tools and functions in so you can easily and quickly make an amazing design for any banner you want to create. If you haven't installed this program yet, you can access it and download Microsoft Publicher from its official website.
How to create a banner in Microsoft Publisher?
create a banner in Microsoft Publisher you need to follow the following steps:
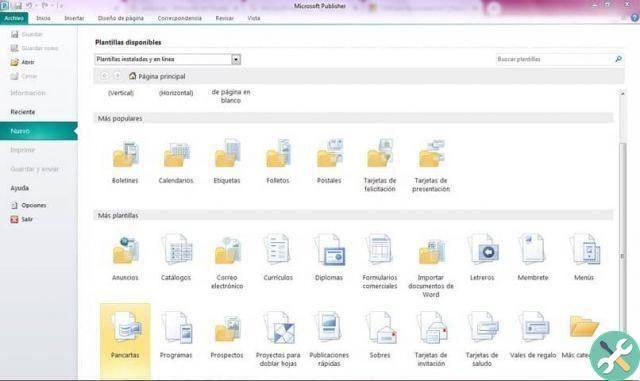
The first step you need to take is to click "New file" and press "Integrated" to start using one of the templates provided by Publisher.
Then you will have to select the «Banner» category to choose and click on the banner design you like best and click on "Create" to start designing and editing your banner.
In the toolbar you will find «Layout in the page», once there you can edit:
- The width and height of the banner by clicking on "Dimensions".
- The color scheme of the banner by selecting "Color scheme".
- Combine the banner characters by clicking "Characters".
How to add images to a banner?
To add images you have to select the «Insert» tab, you will find it in the toolbar and in the group «Illustrations» there will be image buttons. Below we will explain two ways to add images:
- To add an image you saved on your computer you have to click on «Images», then you will have to find and select the image you want to embed.
- To add an image online, you will need to select the «Online Images» button. Next, you will have to press the button «Search Bing images», so that the search box appears, there you can write a word or a phrase that describes the image you need.
How to insert a text box?
You will find the textbox button in the text group, you will find this group in the tab "Insert" of the toolbar. Once the button is pressed, you can draw the text box on your banner. You can also insert a WordArt.
How to save the banner?
If you want to save the editing process you made, you will need to click on "File" and select "Save with name".
Once you're in the menu that appears when you select the "Save as" button, you will be able to select the folder where you want to save the banner. Once you've selected the ideal destination for your artwork, you'll need to click Save and that's it.
How to print a banner?
To print a banner you will need to click on the «File» button and select "Press".
Once the print button is selected, a menu will appear and you will be able select the printer and make some configuration changes.
If you want to print a specific page you need to check the box "Print a single segment" to select the row or column number of the page you want to print.
How to adjust the overlap?
In the "Print" button you will find "Design options" and there you can increase the paper margin, which overlaps the horizontal or vertical printed area on a banner page.
TagsEditore


