


How to create a timeline in Word?
Page setup.
- Within our new text document we need to configure it as follows.
- We enter the «Format» tab and click on there "Configure page".
- In the new tab that we open to configure we find flaps to do it, we will click on "Letter" and there we will modify "Paper size" in that option we need to change from Letter to Legal.
- Let's change the »Height» of our page by 33 cm and the paper size will change from Legal to «Personal size».
- In the «Margins» tab and we change the dimensions from "Top, Left, Bottom, Right" to 2 cm in all.
- And finally let's change its orientation to "Horizontal".
- This way we have the page ready to start creating the timeline.
Run from the timeline.
- Let's select the card "Insert".
- Within this we find the following option, «Moduli» and select the right arrow.
- We proceed to choose the color of the shape and then create it in the center of our page.
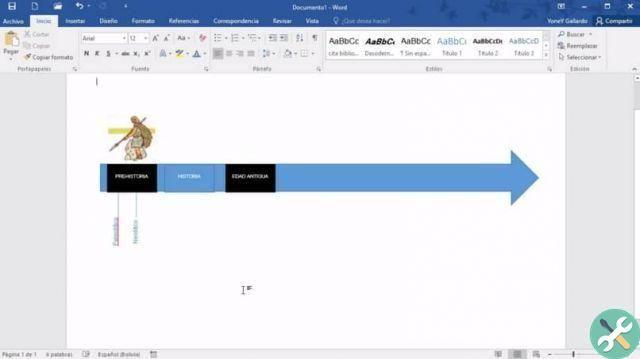
- Let's go back to "Form" and we look for a rectangle, which we make inside the arrow by placing squares of another color to make it stand out.
- Inside we place a text to give life to our timeline, each rectangle will have a different name based on the time we want to show in our line.
- We will play with colors to create differences over time. Between these rectangles on the timeline we need to place thin elongated rectangles vertically.
- For this we need to flip a new rectangle vertically and place the texture moment that will go to the center of the arrow, but from the top with an indicative line.
- Important for these rectangles we have to remove the color and leave them white so that only the text is appreciated outside the timeline.
How to place images on the timeline.
- To position the images within the timeline you need to enter the tab "Insert" and go on "Images" where we select the image to attach, if there are more images, insert an image.
- Let's click "Design options" on one side of the inserted image and select the option «Go in front of the text».
- We can shrink the image so that it only takes up a section of the timeline from the tool "Cut out".

This way we will form our creative timeline in Word, there are more options to create timeline within Word for example with the tool «SmartArt» where you can create a variety of graphics and allows us to use drawings prepared for every need, in this case it has a basic timeline that we can modify to our liking.
Word is a versatile and indispensable tool for students, teachers, professionals because it allows you to create documents in a few steps with very professional purposes, moreover you can make or create organization charts in Word which is of great support for the firm and companies that want to improve their footprint. Although we can too create a timeline in Excel quickly and easily, if necessary.
In style Power point, allows us to create text documents with multiple pages to which once finished we can convert them into an editable PDF file, in this way our work is professional and editable to make any changes to the text, image and add other content to it .
TagsParola


