


Using the program CorelDRAW you can edit our images very efficiently and quickly. If you are wondering how to create and apply a posterized effect to an image with Corel DRAW, please read the following guide carefully.
THE posterized effect it is very reminiscent of 50s art and is still very popular today. With the Corel DRAW program you can create this effect in a simple way, to apply it to any image we have prepared this tutorial.
How to create and apply a posterized effect to an image with Corel DRAW
The posterized effect is still very popular, as it is reminiscent of the classic fashion of the last century. Programs like Photoshop or Corel DRAW are capable of creating very interesting changes and apply distortion effects to objects with tools and many more as posterized. Fortunately, the use of the program is very simple, to perform the posterization correctly follow these steps:
- The first step is to find the image, open the image with Corel DRAW.
- Head to the top area of the screen and look for the option Bitmap. Many options will appear, locate Image adjustment laboratory, click this option.
- To work more comfortably, we recommend that you click on the option Full screen preview.
- It's time to change the values on the screen.
Prepare the image values
The following values will depend on each image, but you can orient yourself with the following information, in any case remember that your criteria are also valid.
- Temperature: In relation to the temperature there is not much to change, unless you think it is completely necessary.
- Hue: we recommend that you leave the hue at the original value.
- Saturation: it is recommended to set it to the lowest possible value, that is -100
- Brightness: The brightness depends exclusively on each image, in any case it is recommended to clearly see each of the details of the photograph.
- Contrast: the contrast directly compromises the details, so handle it in a clearly visible way.
- In evidence: it is recommended to use highlights at high values, close to 80
- Shadows: Minimize the shadows as much as possible, close to the values of -85 would be fine
- Halftone: for as for the midtones, we recommend that all image details be visible, so keeping it at around 50 should be fine for most images
Likewise, making other color adjustments to the photo with CorelDRAW could be very handy when editing.
Start vectorizing
To apply vectorization, click on Vectorize bitmap and subsequently on Vectorization Contour, then click line-art.
- Detail: The detail section is essential to create the posterized effect, so we recommend keeping it at high values, close to 80.
- anti- aliasing : the anti- aliasing should be around 60.
- Corner smoothing: like the previous style, the corner smoothing should be at medium to high values, close to 80.
Go to the color tab, locate the del option number of colors and select the number of total tones you want to manage. In any case we recommend values lower than 7 in this way the next process will not be complicated, at the end press on accept.
Note that all of the above options are basic, so if you want to vectorize a bitmap image by type with CorelDRAW in a more advanced way, you can visit the guide in the previous link.
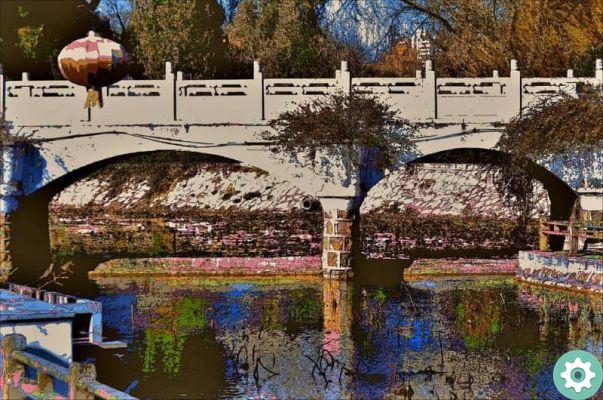
Apply colors to create the posterized effect to your image in Corel DRAW
- Click the Window option, then click Dockable windows and finally on the option Color styles.
- Drag the image in the section "drag here to add a color style and create harmony".
- Some options will appear on the screen, click on the fill and outline, now do click on the option OKAY.
- In the color styles section the current color palette will appear, which should be black and white, click on it.
- Finally configure the colors you want to apply to your image. After this, the posterized effect will already be applied.
While the process shown above is pretty straightforward, the truth is that you can design a webpage with CorelDRAW and many other actions with the right dedication.


