


This program, while simple, contains tools and functions that are not that easy to perform if you are a beginner.
However, in this article you will easily learn how to create and record a Macro in an Excel sheet in both Windows and macOS. But first, you need to know what is a Macro and how it works. Here you will learn how.
What is a macro and what is it for?
A macro comes used to automate certain frequently performed tasks to save work. It is an action or set of actions that can be performed as many times as you want.
When you create a macro, mouse clicks and keystrokes are recorded. Even so, after it is created, some changes can be made.
In other words, it is a series of instructions that come Saved within an Excel file to be run when we need it.
This tool is very useful because doing the same tasks frequently can waste us precious time that we can invest in something else, so automating them can save us a lot of time.
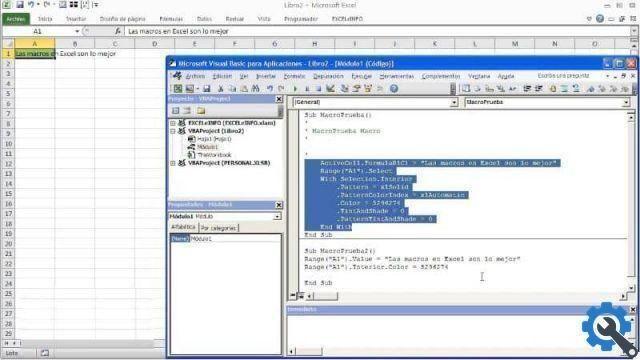
These macros are written in a computer language called “Visual Basic of Applications” (VBA) and although it is clearly necessary to learn that language, it is very simple and here you will learn how to do it. In addition to these options, Microsoft also offers other functions and you can learn from their official site.
How to create and record a macro in Windows?
To create a Macro, you don't have to do much. In fact, it's very simple and by following these steps you can do it quickly. We will first see how to do this using Windows.
Step 1
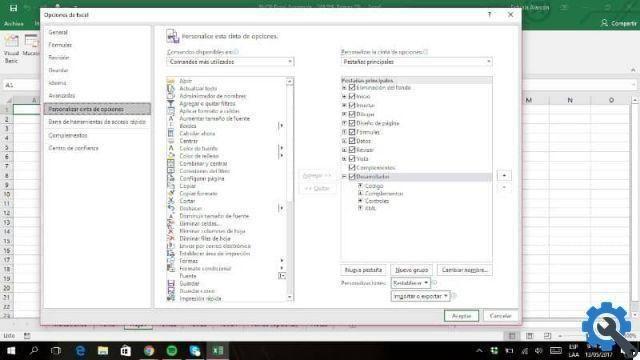
To check VBA macros and tools you need to go to the "Developer" tab. If you haven't enabled this option yet, it's also very easy to do so.
To do this, you just need to go to the tab "File", then click "Options" and click the "Customize the Ribbon" option. Once there, in the “Main cards” section, activate the “Developer or programmer” option and that's it.
Step 2
In the “Code” section you need to click on the “Record macro” option. You can name the macro in “Macro Name”, you can also choose a shortcut key in the section "Hot key", a description in the section of the same name. Press “OK” and the recording will start.
Do whatever you want it to record in the Macro so that it automatically runs afterwards. When finished, press the "Stop Recording" option
3 pass
Then you just need to run the macro to review and test it. If you want to edit a macro after it has been recorded, you just have to go to “Code”, click on “Macro”, select the name of the Macro we want to edit and press the “Edit” option.
How to create and record a macro on iMac?
If you have an Apple device, specifically MacOS, here you will learn how to do the same on your device, just as easy.
Step 1
If you haven't activated the developer option yet, you'll need to enable it. To do this, press "Excel", then "Preferences", "Toolbar and Ribbon".
Then in the "Customize Ribbon" section in the "Main Tabs" list, select "Scheduler" and then "Save".
Step 2
After enabling the “Programmer” toolbar, click on “Record macro”. Right there you can rename the Macro, specify a shortcut letter and a description of it. Press "OK" when you are ready to start recording.
Choose and execute the actions you want to automate and become part of your Macro. Then you just have to hit the “Stop Recording” option when you're ready, in the tab “Scheduler”.
3 pass
So you just have to test the Macro and make sure it has been recorded in the correct way and the way you want.
If you want to change it, you can also do it in the section “Macro”, choosing the name of the corresponding Macro and pressing “Edit”.
And if you want to learn other similar things, you can read this article to learn how to use and relative reference in Excel while recording macros.


