


In them we can insert infinite messages, information, images and even advertise some brands on social networks, YouTube videos or people who are supporting us in this project
However, for many people this task is complicated, because they believe that the best way to do it is through the use of Photoshop. But is not so. Within the web you can find various platforms, which can help you in this task regardless of what or how.
For this and many other functions, P is the ideal application for you. This tool web is based on a completely free online photo editor, although some features can only be found if you pay for membership.
However, in its free version, you can find more tools that will make you feel like a pro in editing. With this tool you can create multiple banners or some headers for your blog with different images and special effects.

What other ways can I use this platform?
- You can create various collages and picture montages to be displayed for homework, murals, covers and various jobs.
- Here you can also create original designs for banners, posters and even infographics.
- Here, too, you can learn several basic techniques on retouching of different photos.
How to create a banner with PicMonkey
To get started you need to choose where will be the place where your banner will be placed. Likewise, it is important to know part of its measurements, so as not to make mistakes and make mistakes. Once you have this information, you need to go to the PicMonkey official page and enter your profile.
If you don't have an account on this site, we recommend opening one as soon as possible, it will be a very useful resource in the long run. After that you need to create the canvas on which you want to paint or create your banner.
To proceed with this activity, you need to go to the «Create a collage» button. There you will see that a new window will open in which you have to click on the Layout symbol. It is in this section that you can insert the measures of our banner. After entering this information, we proceed to click on the lock to set these measurements.
Once we have everything ready on ours fabric, we will proceed to click the button «Save». There we will give it a name and save it. This is where the fun will begin.
To do this, we will proceed to open the PicMonkey page again and access the section «Edit a photo». There the page will ask us to choose the photo we want change, which in our case will be the canvas we saved earlier.
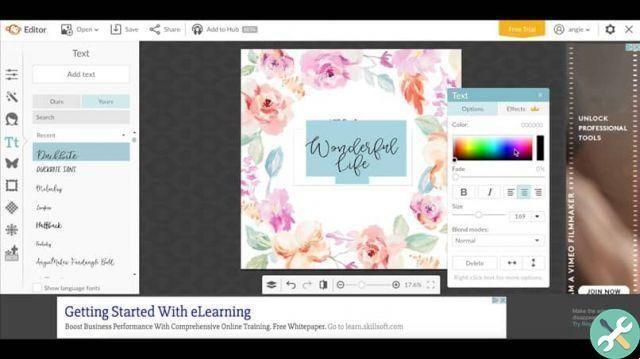
Positioning ourselves in the menu on the left, we can begin to drag different geometric figures, as well as texts and icons, to which we have to change color and size, etc.
Within the editing section, you will see that there are several features that have a crown at the top, this indicates that they are paid applications, that unless you pay for it, we will not be able to use them.
Once the banner is finished, you must proceed to press the button » Save »And it will be automatically saved to your desktop.
It's ready. With all these super easy steps and instructions, you will have no problem creating and uploading a banner to your favorite webpage.
TagsTutorial


