


In today's article we will go to see how to create a boot partition using diskpart in windows in an extremely simple way and in very few steps.
DiskPart is a command utility that allows us to manage our disks using only commands. It is a slightly advanced way to create a boot partition with DiskPart in Windows and manage all our disks.
At the same time we have the ability to do some things that we cannot do in the Disk Administrator how to turn a basic disk into a dynamic one, erase all information on any disk, manage partitions to create, delete and modify them, reassign, change letter, etc.
In a nutshell, we can format partitions in AOMEI Partition Assistant and do many things that we couldn't do from the disk manager. That is why it is very important that you learn how to use it, even in an elementary way. Although you also have the option to copy or duplicate partitions with AOMEI Partition Assistant Pro.
How to use DiskPart to create a bootable drive
DiskPart is a utility that we need to run from the command prompt window. It is included in the operating system and we can create, delete or expand any partition.
After creating a partition, we will be able to modify its boot files to run the boot partition. This way we can load Windows files into it and get a boot partition.
- For this, the first thing we need to do is connect the USB drive to the computer.
- So we'll have to click "Start" below the left of the operating system or press the Windows key on the physical keyboard.
- After that we will go to write " Command Prompt "Right click and choose" Run as administrator ".
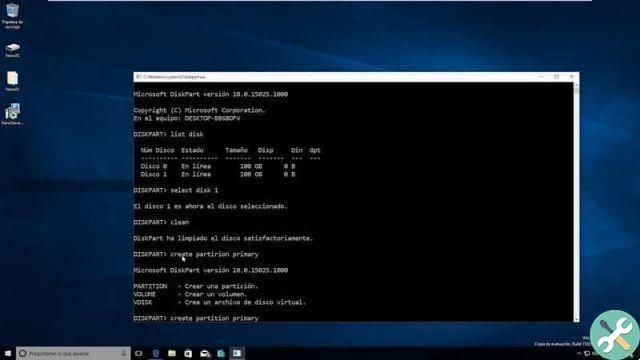
- Subsequently, type “diskpart” in the command prompt window and press enter to access DiskPart.
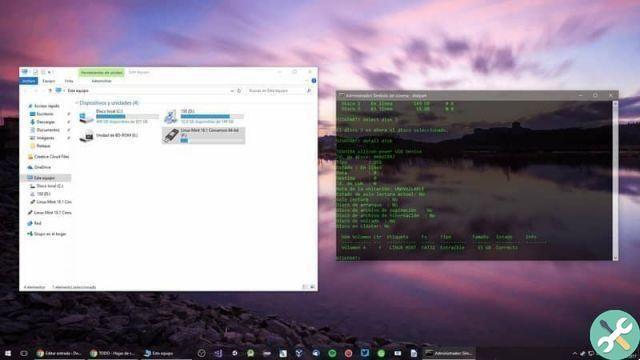
- After that we will have to write " list disk ”To be able to see all the disks that are connected to our computer.
- To figure out which of all the disks you need to partition, you'll need to rely on the size of the disk. Next, you will have to write " Select disk D For example, the letter must match the disk in question, it does not necessarily have to be C.
- After pressing enter you will have to type " partition list ”And press enter again.
- Now you will have to write " Select partition 1 ”And again we press enter. So we will write “activate” to make this primary partition active.
How to create a boot partition with DiskPart
- Now you will have to write " form fs = ntfs ”And press enter again to be able to format the removable drive. Note that the formatting of everything in it will be erased. So be sure to make a backup.
- After that you will have to write " cd : boot “, Press sending and now let's write " bootsect / nt60 : ". The part of " flash unit ”You will have to replace it with the drive letter and press enter.
- To finish, you will need to type "Exit" and now we will have to open Windows Explorer.
- We will have to right click on the disk drive and choose the option that says "Copy" in this way you can copy the contents of the operating system.
- Finally you will have to open the USB drive and paste all that content so that it stays on the removable drive and that's it.
We hope that was clear to you how to create or create boot partition with diskpart in windows. However, in case you still have some questions, you can leave it a little below where you can find the comment section and we will be happy to help you solve it as soon as possible.
Tagsfinestre


