


Good boy!!! What a joy you received a paper photo from a long time ago, you want to digitize it. To do this, today you will learn how to digitize your photos with your mobile.
At first glance it may seem that scan photos with your mobile device be a very simple thing; some think you just took a snapshot of the photo with your mobile phone.
But the reality is that photos on paper tend to have reflections and reflections that are very difficult to avoid with a mobile camera. Which makes the result not as good as you expected.
This is why a few years ago Google launched its Google Fotoscan application; an application specially designed to digitize your photos on paper. Google Fotoscan is a free application available for both Android and IOS; Thanks to it, you can easily do digital copies some old photos you have at home.
Not only that, there are also applications that allow you to scan documents from your Android phone using CamScanner. What good is that? Well, one advantage is to scan your documents on Android and convert them to PDF. Then, you will learn how to digitize your photos with your mobile.
Digitize your photos with your mobile
Step 1: get to know the application
After downloading, it shows you the basic functions of Photoscan, you follow him while you learn them.
Step 2: choose your photo
After photographing that memory you want to recover, you have to select the photo you want to digitize, for this you have to locate it in a specific place or in a folder in your file manager or look for it in the gallery of the phone.
Step 3: Find the perfect place to digitize it
But you have to be careful with the result of using Fotoscan, what I recommend is to use flat surfaces to position the photos before scanning them and having them in a well-lit place but that its light does not directly affect the image.
Step 4: start scanning
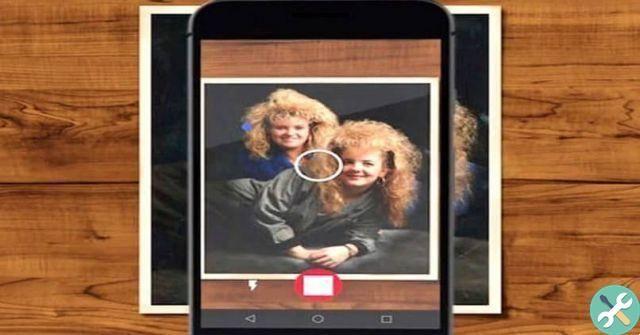
Capture the image of the photograph, with the viewfinder of your mobile phone and you will see how super it is put on some white dots that the photo has, you have to surround all those dots with the viewfinder of your phone until you do it on the four white dots that the application has.
Never forget to make good use of the light in the place where you are about to take the picture, as the flash could damage the digitization, also when you overlap the white points you do it calmly and skillfully.
Step 5: Last step to digitize your photos with your mobile
In the application Google PhotoScan you can polish your photos, rotate them, crop them, adjust the colors, you can also adjust the edges to avoid things like the edges of the photo or even the surface you scanned on.
Despite the advantages of FotoScan, some photos may appear damaged; in these cases it is recommended to restore faded, old or stained photos with Photoshop. Of course, you must first transfer the photos or files from your mobile to your PC and then put them back on your mobile with a USB cable.
In any case, if you are careful to follow the application instructions without rushing, you will get a good result. If the first time did not go as you expected, nothing happens; You can repeat this until it's okay by following these tips.
Thanks to Google FotoScan, you can have one digital copy of all your old photos on paper. Get that they are better preserved and that you can also share them on social networks; or with your friends and family via instant messaging applications.
As you can see, PhotoScan is an application very helpful and simple that will allow you to recover good memories; digitizing them and saving them forever. The greater the range of the phone, the better the digitization result. But regardless, the application will enchant you.
EtiquetasTutorial for mobile devices


