


The different functions, instruments and the options we can use to create fabulous effects in our graphic designs are impressive.
And thanks to the use of the Corel Draw program, we can also create a calendar, if you read it. In the next tutorial we will show you which steps you should follow for easily create a calendar using Corel Draw macros.
With this application you can generate your personalized calendar in minutes, without the need to download a template from the web. This is the interesting thing about this type of program, its great versatility. And through it you will be able to create automatically a calendar and for that you just have to follow the following instructions.
It may seem to you that carrying out this project is a bit difficult or complicated, but nothing is further from the truth. Easily create a calendar using Corel Draw macros it's as simple as adjusting the color of a photo.
How to easily create a calendar using Corel Draw macros
To Easily create a calendar using Corel Draw macros, we will use a little-known and very powerful feature. And it is about creating and running VBA macros, with it we can perform any kind of complex or repetitive task. And to use it we will do the following.
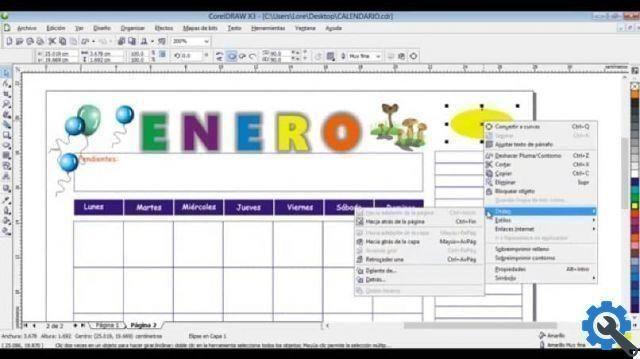
First we go to the application and open a blank sheet, then in the top menu we will select the Tools tab. And now we will look for the Macro option to select it. And finally, in the different options that will appear, we will create a clip in the Play option macro.
This action will generate a window to display, in it we will create a clip in the Description option so that different options are displayed. Of which we will select the option Calendar Wizard. And then we will click on the Run option, now a window appears on the screen to configure ours program .
Using the Macro Calendar Wizard in Corel Draw
In it, we can select the type of program that we will create, we will also select the language, year, month, day, week, etc. We can place the day the week starts, we can also distribute in the document, the way the months will be displayed, if you want to add any other elements, such as an image you can leave blank spaces.
As you can see, in this window you can fully customize your calendar to your liking, on the right side it will show you a preview image. We can use the Holidays button to add holidays or holidays. When we create a clip we have to select the day, month and name of that day, such as San Juan.
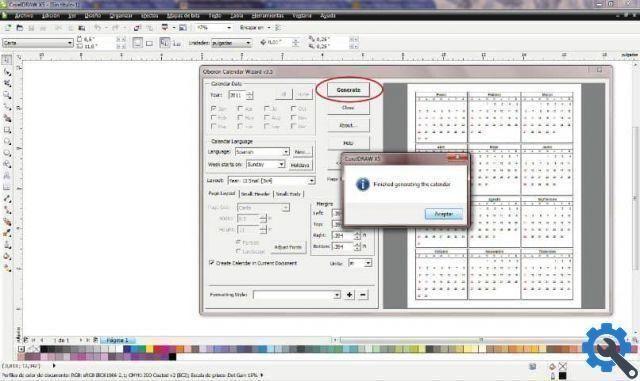
Then we will create a clip in the option Add / Edit to add the date of the holiday and this same procedure we will perform, with the other holidays that we want to include in our calendar. When we have already made all the changes and included all the data in the calendar and are happy with its appearance, we will click on the Generate option.
Pass a few seconds before confirming with the following message, Calendar generation finished. And the last step will be create a clip in the Close option and the calendar will be ready. Thus, you can edit, change the color, font, size, style, orientation of writing, etc.
The end result is simply fantastic and the best part is that we can completely customize it to our liking or need. This way we finish another article that teaches you how to use the different functions of Corel Draw. And in a simple way we could show you how to easily create a calendar using Corel Draw macros.


