


What is Power Point and how useful is it?
It is a program designed to create eye-catching documents, presentations, concept graphics, and more. In it you have the opportunity to use texts, music, images and animations design or save to your computer in advance and you can control the entire presentation development with the helpful action buttons.
When you do exhibitions and presentations, it gives you the possibility of models determined or designed by you; as well as animating texts and words with different formats, sizes and colors, inserting images, animations, videos and music to give life and creativity in your exhibitions.
Knowing the usefulness of this program, you may have doubts about how to use it; but here we will help you in one of the most common doubts, such as editing and inserting images in Power Point.
How can you insert and edit images in Power Point?
First of all, when you open the program you need to anchor the ribbon; for that, click on any option and step down to the bottom right of the ribbon, where it says again; then go to the part that says pictures, where you can import the image you want to insert and modify; inserting it you can change many aspects.
For example, with the indicators in the corners you can configure the aspect ratio of the image; Besides resize both width and height, without losing the proportions already chosen; Also at the top you have an indicator to be able to rotate the image.
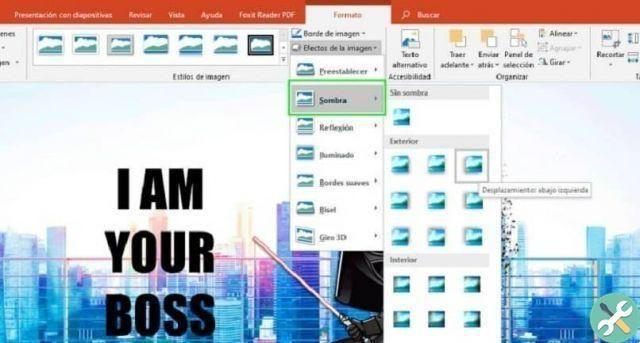
When you have the image, a banner will appear at the top with the name image tools; in the format part you will have everything you need to work on the edition. Among other things, you will have the option of remove the background from the image. With additional tools you can mark the area to keep and mark the area to remove.
Also in the corrections box you can put the image more dull, blurry or very sharp; You will also have the option of vary with contrast and brightness image. You can experiment with the option you need, before saving your changes.
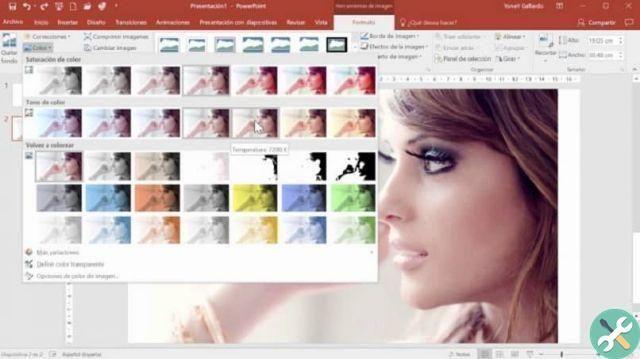
If you want to change the color of the image, Power Point makes it possible; go to the color tab, where you will see 3 options :
- The first is color saturation, this option allows you to remove the saturation from the image, bringing it to black and white, or to over-saturate the colors, bringing it to its maximum expression.
- The second is color tones, here you can play with the temperature of the image, from a cold feeling to a warmer tone.
- In the third option to recolor, you can make small effects to the image.
Last steps
If when you finish your work with all the required changes, you realize that it was not the image you were supposed to select, you will not lose your editing work if you change the image; When you select the Change Image tab, you choose the correct image with the same modification already made.
Also you can adjust the size more specifically on the final part of the headband; Also in the rotation section you will have the possibility to rotate the image in specific percentages to the right or left, or to flip it vertically or horizontally. To finish your work go to the file tab and save your image in my documents.
In a very practical and varied way you will be able to learn how to insert and edit images in Power Point; If you liked and found the above content useful, don't forget to follow us and leave your comments at the end of the article.
Etiquetas Power outlet


