With this tool we can not only control and manage everything on our disk, but it also helps us to safeguard the functioning of the system. Related to this topic, you may also be interested in How to Change Permissions of an External Hard Drive on a Mac.
Disks are essential elements for our PCs, as they intervene in system startup, as well as ensure smooth operation of the system. This is why it is important to have a thorough understanding of its operation and maintenance.
What are the functions of this tool?
Among its functions we can highlight the following:
- He is responsible for carrying out a complete audit of all units they are in store the information in order to check for errors.
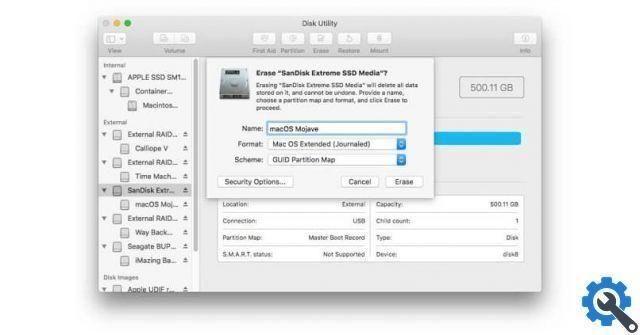
- It supports the management of various external storage devices.
- In case of problems within the discs, this tool will check and repair all errors on the local disk and external drives.
- Helps to manage the space between available volumes.
Uses of disk utility
- It is used to repair a disc damaged.
- If the system needs it, it performs an unexpected shutdown of all applications running within the system.
- Helps to mount, dismount and eject an external drive.
- We can perform one validation complete with all those corrupted files.
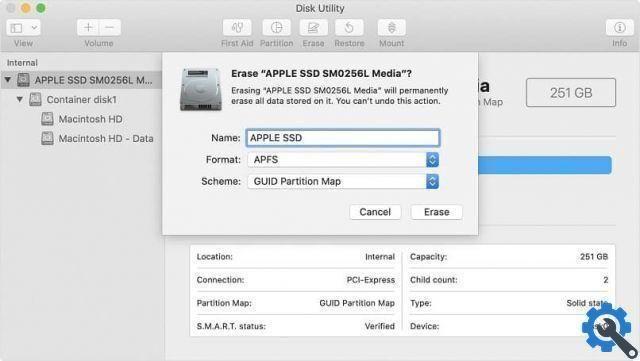
- Erases, formats and helps partition a disk or, failing that, the selected drive.
How to access Disk Utility from the Finder
- One of the first steps we will carry out will be the direct search of the search engine which is integrated in all MacOS. This bar is also known as the Finder. Once found, we need to access it and from the window icon displayed, we will go to the " Applications "
- Once there, we will see a series of options, but you have to go to the “Utilities” folder, which we will double click on. Once this option is opened, we can see that a window will appear in which we have to double click on the option that says ”Disk Utility“.
Here, once opened, we can see and access all the options that have been mentioned above and make use of them.
Open using Spotlight on MacOS
Spotlight is part of the smart search engine built into macOS devices. In it we can carry out all those searches that are based on the criteria we have indicated. To access Disk Utility from Spotlight, you need to follow these steps:
- If you want to launch Spotlight, you can perform two different actions, but they will lead to the same action, which is to open Spotlight:
First option: Start by clicking on the icon with a magnifying glass. You can find it at the top right of the desktop. Once pressed, you've already launched Spotlight.
Second option: they are one of the most used, as it is an intuitive option. You can open Spotlight using the key combination: ⌘ + space bar.
- Once opened Spotlight, you will see a pop-up window, in which we have to enter the word “disks”. Once ready, you have to start by selecting the option " Disk Utility ”And voila, you will be able to see all the options this action offers you.
With these steps you can quickly and easily access the option " Utility Disco in MacOS ". It is important that you know all the options your device offers you when it comes to finding some type of error and always remember to free up storage space on your Mac OS hard drive.


![Apple Vice Presidents Talk About Development of M1 for Mac [Updated]](/images/posts/c6254b668e5b3884d6b6338ccb8a02ff-0.jpg)