


How to adjust the Wi-Fi wireless functionality in Windows 10?
Before you can begin adjusting the wireless functions, you must first log into the operating system with your normal session. In this way, you will be able to learn how to manipulate the Wi-Fi connection of the equipment.
Now, the next thing to do is locate the system icon in the lower left corner, then click on it to open the " Start Menu ”In Windows.
From the panel that has been displayed, you will choose the gear icon which is located on the left side of it. Or you can access the " Settings "In the way you prefer.
The window " Windows settings ”10 will contain various modalities and elements to be adjusted. In this case, you should opt for the option " Rete and Internet ".
Consequently, the system will open the window with the networks section, in which there will be a side menu from which you can choose to click on the tab relating to " Wi-Fi ".
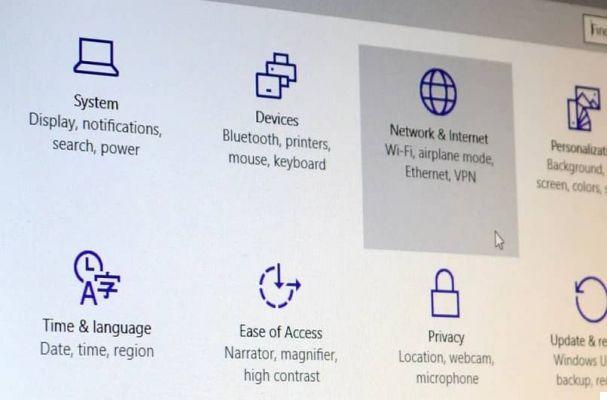
Finally, the window will show in the center a section dedicated to the " Wi-Fi ", where you can find a scroll button. This switch is responsible for turning the Wi-Fi wireless functionality on and off in Windows.
Connessioni wireless in Windows 8
In order to change the Wi-Fi wireless functionality in Windows 8, you need to log into the system's initiated session desktop.
In this screen, you have to press the key combination " Win + C ”For the operating system to open a new drop-down menu.
This panel will be on the right side of the screen and you will be able to view a variety of sections in it. Of which, you will have to click on " Configuration "To proceed.
In this way, the system will display a bar, in which it will be necessary to choose a mode called " Change PC settings ”So that, finally, the corresponding window opens.
The location mentioned will have a side panel with sections. Of all of them, choose what it says " wireless "Or" Rete wireless ". This section in the loading phase will present you, on the right side, a button " Wi-Fi "With which you can activate or deactivate the function in question.
Steps to adjust wireless functions in Windows 7
First of all, you should turn on your computer and log into Windows 7 regularly. So that you can open " Start “, Which you can do with the keyboard shortcut or via the icon on the system tray.
Next, you will have to go to the " Control Panel “, The best way to do this is to use the system's search engine.
You need to click on the " Control Panel ”So that Windows can open the corresponding window. And where you will choose the section " Networks and the Internet ".
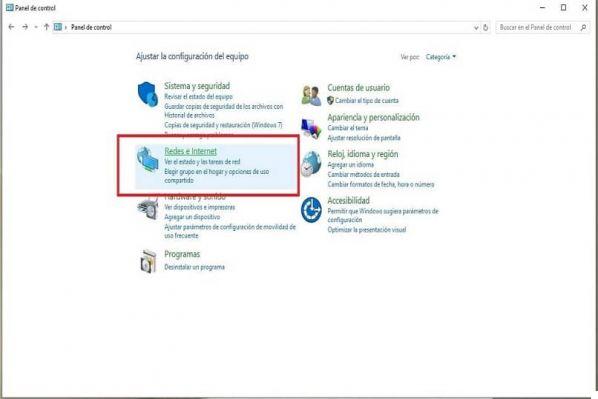
In this sense, and so that you can change the Wi-Fi wireless functionality in Windows 7, click on the option " network and sharing center ".
A series of sections will be placed within this window, you will have to choose the tab " Change adapter configuration “, Which is the one indicated.
Thanks to this, the operating system will show you another window that includes a variety of devices. Of these items, you have to find and right-click on what it says " Wi-Fi "Or" Wireless network connection ".
Finally, you will get a drop-down menu, where you can click on " disable "Or" Attiva ”Depending on the case or what you want to do.
Once you have managed to connect to the wireless network, you must know that there is the possibility of connecting to two wireless networks at the same time from your PC or that you come to present the problem that your computer disconnects itself
Setting up the Wi-Fi wireless connection on your computer will help you perform many tasks that require the use of the Internet; You can use it for activities like the ">
">


