


Le frames in Word they are used to give a different detail to your text documents in Word, for example; Decorating a personal letter is important to get a different look, you can vary the decorations and they are very useful. Making presentations with frame details in your project would be ideal with a custom frame. If you also want to give your document a personal touch, you may be able to write with Chinese letters or characters in your Word document.
How to place a frame in Word?
- Let's open a new text document inside the program Microsoft Word. If you haven't installed it, you can download Word from its official website.
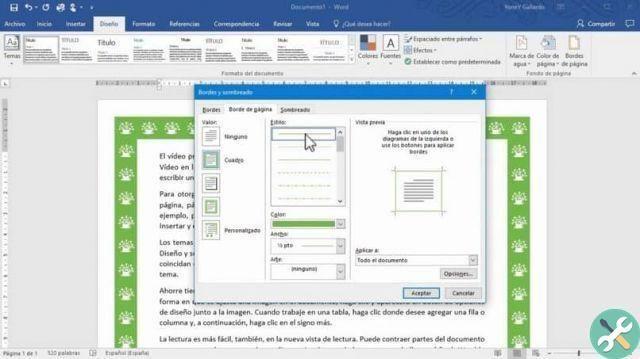
- Inside we have to start with the option "Design" and inside we will look for the option "Page borders".
- A new window appears in which we will configure the frames we want to add to our project.
- Different design options will appear, from dashed lines to more elaborate borders with the design and all we have to do is select the one you like so that when you click accept the frame will be placed on our page.
Can I choose the colors and sizes of the Word frames?
If you can choose colors and change size as many times as you want in your text sheet in Word.
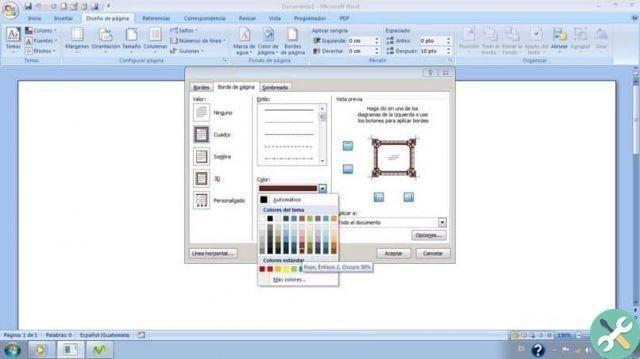
- We enter "Page borders".
- We select the border design that is our preference for the project.
- Below are the colors and by default determines "Automatic colors" in this way it will take the color we are using in the text, in this case, black.
- By clicking here, the window is displayed where we will see the variety of colors that we can choose for the frame.
- The size of the frames can be determined just under the color option, we can go from the thinnest to the thickest size of all, this will depend on your project.
- With these changes we just have to press "Accept" and the change will be in our text sheet.
How to place art inside our frame in Word?
- We can simply place the figures inside our frame like "Art" and the look will change, depending on your project this might be a more fun option.
- In the option "Page borders" we will see that after the colors and the size of the borders, the option is present "Art" and when we click a new selection of frames will appear, in this case they will be figures, from stars, fruits, food, doodles and more.
- We select the one we like and click OK.
- Important: our graphics will be affected by the color we defined earlier, that is, if we previously selected a frame in Blue, our graphics will also be affected on the background with a blue color.
- If you want this color not to affect the art, we can bring the color back up "Automatic" and therefore we will only see the art without color changes.
- The size of our art can also be changed by the option "Length" where as we go along we can preview the changes in the same window.
How to delimit only text in Word?
- We write in a new text document the words we want to be in it.
- When done, we will click on the tab "Design" and then on the option "Page borders".
- Inside we will find "Borders" and within other boundaries related to the text of our project, where we can generate boundaries of different styles but no longer have the option of "Art".
- By clicking on «OK» we can see the changes in the text sheet.
If you don't have a computer at hand and you need to edit a Word file, you can make changes to your Word documents from your Android phone.
You can find more step by step information on how to set table cell background color in Word on our website. Look no further for guides, this is the most comprehensive on how to insert frames in Word, add borders to Word page! .
TagsParola


