


Find out how to make a perfect cutout in Photoshop
The first thing to do is open the programma Photoshop CC and the file tab will appear at the top left; When you select open, the My Documents folder will appear, where the image will be that you want to edit or cut.
When you select it, several pop-up tabs will appear, select the option not to change and then ok; the image will immediately appear in the work panel.
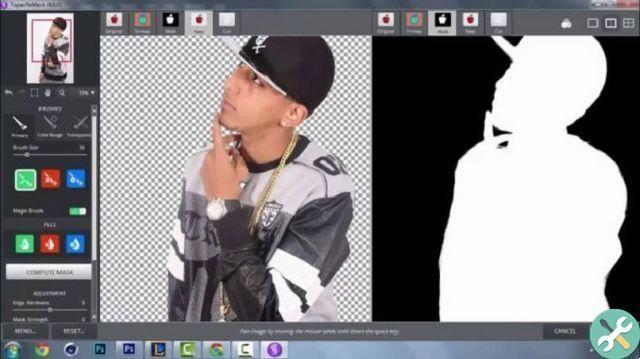
To remove the background you can have several options at your disposal; the first way is to cut out the figure as such, there are more tools. One the most used is the quick selection; With it you select with a brush or select with the pen tool, the image you are interested in cropping and very gently you will refine the edges.
To be able to refine it, go to the selection tab and tap the option to refine the edge; When you are there, a brush will appear, with it you select the surrounding edges and automatically the areas that are considered part of the photo are added to the photo and remove the excess ones.
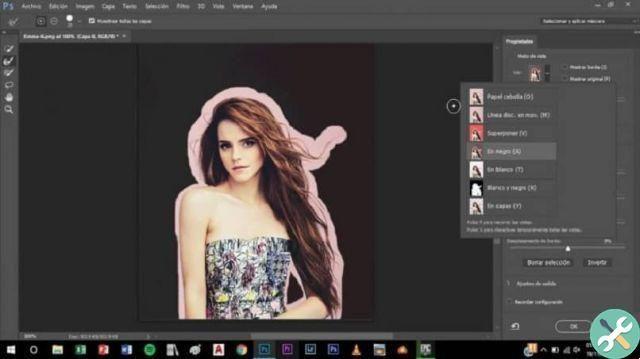
To see how you are, select the smart radio part, then go to the views and choose a background; If you see that it is very rough, select the border setting, you can vary with the smoothing, with the cutter and the contrast; You can also move the border or remove it if necessary, to render the image more complete.
When you have the measurements you are looking for, press ok, then ctrl X to crop the final image and then add it elsewhere. If you want to duplicate the image , before cutting it press ALT and ctrl X, open another layer and paste the duplicated image, and the previous one remains the same.
How to remove the background image?
Another way is to remove the background directly; For this you can use the magic wand tool, with it select and increase the areas where you want to remove the background; then like the previous cutout, select refine edge and choose a background to see what the image looks like.
Using the brush, go along the entire edge and when you click, the excess is erased; with a lot of patience and delicacy, pass the brush in order to obtain a good final work.
Remember before cutting to select the smart radius, to adjust the most even and create a very smooth draft; Once this is done, double click on the image in order to create a floating layer and position the image; Now, even if you want to remove the background from the image, you can go to the selected part and tap the inverted selection part and the background disappears.
You can also change the background to a more natural color or the typical photographic background, select a radial gradient; In this part, choose the color you like best, light and soft or dark and strong; then you place the button from the center outwards and step on it invert, so that it gives the color you were looking for.
Although there are other ways to cut images, here we show you the ways simpler and faster offered by Photoshop CC; so that editing your photos or those of your friends is no problem. If this information has helped you a lot, don't forget to share and leave your comments.
TagsPhotoshop


