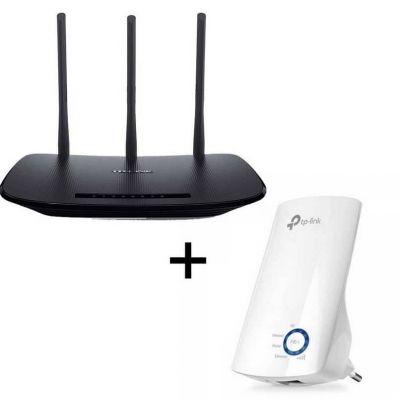
That's why they exist on the market WiFi signal repeaters and among these the TP-Link repeaters stand out, which facilitate access to the internet connection quickly and can be used via electronic devices such as Smartphone, tablet, console, laptop, Smart TV, among other things, the creating a wireless network.
In this article we will show you how to set up and connect TP-Link repeater extender to increase my wireless network.
How to configure the TP-Link Extender repeater
The main function of repeaters TP-Link is to send WiFi coverage to access areas that a router or modem WiFi does not reach, with the aim of improving the signal in the required area with more power and speed. If you would like to acquire the most up-to-date TP-Link, you can log in to its official website so that you are aware of the news.
In this step by step we will teach you two different techniques to achieve a successful setup.
Configure with WPS button and Range Extender
- To begin with, you need to check that your router or modem is equipped with the WPS system and for this we need to check that the WPS button is outside the equipment.
- When you find the button, you need to connect the repeater TP-Link an outlet near the modem or router.
- It takes a few seconds for the repeater to turn on completely.
- After switching on we have to press the WPS button located on the router or modem for 3 seconds and then release it to quickly press the button range Extender located on the repeater and press it for another 3 seconds.
- At the end of the pairing process with the modem or router, we need to disconnect from the electrical outlet and transfer it to the final place there.
- It is recommended to install it in the center of the home or office where there are more signal problems.
- If you are unsure about the configuring the WiFi repeater you should make sure that the outer circle lights of the equipment are on.

Configure via computer without a WPS button
- First we need to connect the repeater TP-Link in a nearby outlet, once plugged in, we have to wait a few seconds until the external light starts flashing.
- So we have to connect the equipment to the computer, via ethernet cable or wirelessly.
- In case of connection via ethernet cable, it is necessary to disconnect the computer from any wireless network.
- At that point we need to connect the WiFi repeater to the computer using an ethernet cable.
- If otherwise we have to connect it wirelessly we have to do it by disconnecting the wired connection. By clicking on the wireless networks option that you find on the desktop and then updating to connect the TP-Link repeater, to locate it we must keep in mind that the factory name is “TP-LINK_Extender_XXXXXX”.
- When you are done doing either of these two ways, you should continue with these steps
- Open your favorite browser and in the navigation bar you should type “Tplinkrepeater.net” and press " sending ".
- Within this page you will find different methods, but you will have to choose the one that best suits your needs, when you have chosen an option the page will ask you for a password and a username where you will have to enter "Admin" in both boxes.
- Entering with the username and password, a page of "Quick setup" and select the WiFi network of the modem or router.
- You will type in the WiFi password of your main modem or router.
- In the end you will only have to check the led lights that are located outside the equipment and that will indicate the signal strength. If all the lights come on, it will indicate that the configuration was successful.


