Pingo is a free and open source application that aims to enhance all types of images available for Windows operating systems. It is also a command line program that allows you to compress, optimize and reduce images with or without loss of quality, with a compression rate in JPG or PNG format.
This tool has been designed so that you can optimize different image formats using techniques lossless o lossy, thus transforming the images in the process.
After downloading this application from its official page, you will be able to see the file inside a ZIP, to start developing the application you need to open the CMD window on your computer and then drag the pingo.exe file into the CMD window , then you will start compressing the images as you like.
What are their characteristics?

Among its peculiarities you can observe that it instantly compresses the images that are available in your directory, it can be similar to PNG, JPEG, WebP and APNG formats, it is lightweight thanks to its powerful free format algorithms, you can also clear the metadata of the photos to improve privacy.
Choose the image quality level, flip, resize photos, and reshape and enhance color, as well as transform them, which allows you to remove transparency or place images on a greyscale.
How can you optimize photos with Pingo?
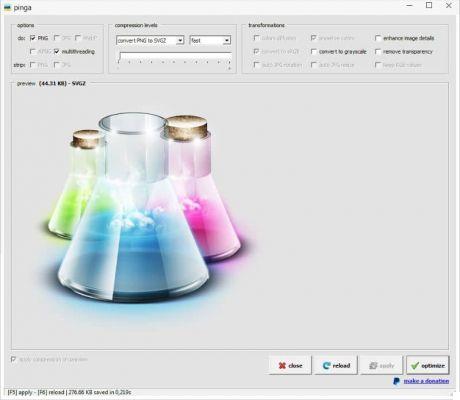
You must have previously downloaded the application on your computer, and run it already installed. So what you need to do to get started opens the finestra CMD and then move the pingo.exe file into the CMD window so you can start compressing the images into the layers you want. If you still don't know how to open the CMD command window, this article is of interest to you.
Now hit the Enter key and it will show you the layers you want to compress your photos to. Further on in the left column you will find the 5 to compress without losing image quality and on the right three levels of lossy compression.
If you look carefully compression of the image in the left column, you have the option from “s0” to “s4” to change the compression. In the compression of the images on the right, however, they go from “X0” to “x2”.
Put the space “pingo.exe” and put a dash and the compression quality you want in the image or photo, then put the folder position in quotes and decide if you want to perform the compression in part or individually.
If you choose to do it in part you can use this code (C: UsersNeoteoDesktoppingo.exe - s1 C: UsersNeoteoDesktopNeoteo). It is important to remember that lossless compression is in PNG format and lossy compression is in JPG format.
I recommend that it is essential to avoid making a backup, because the application can directly run the original files on your computer.
Once the options are configured, click on Optimize button And that's it. In seconds you will have your photos optimized with Pingo based on the options you have chosen.
Don't hesitate, Pingo is a great application that can be used for future projects, but it's worth mentioning that it's still in development. However, it is clear that Pingo has great potential, so much so that it can surpass FastStone Photo Resizer.


