


For this activity, Visio has multiple templates presets with which you can easily create vector drawings and add many useful functions when editing. But before you get started, it might also be helpful to know how to create an event calendar in WordPress and then organize your website as well.
How to create a calendar in Visio
To get started, open the program. At the top of the window, click on the "File" tab, from the menu choose "New". Select "Schedule", then click on "Calendar". This will take you to a design panel, with a blank page.
Now, on the left side of the window, you will have at your disposal a panel with all the tools you need to create the calendar. In “Shapes for calendars” you can select and drag the calendar view you want to create onto the drawing page: week, several weeks, year.
Dragging the shape onto the drawing page will display the “Settings” dialog box. In this box you can specify the details and features you want the calendar to have. For example: the dates it covers, the start of the week, the shading of non-working days, etc.
You can select and specify details according to your preferences. To see the result, click "OK". Automatically, you will see how the calendar you have selected with the chosen details is drawn on the page. You can easily resize and position it however you like.
If you want to add more pages to your calendar, perhaps adding pages with different groups of weeks, in the "Insert" menu, click "New Page". A new sheet will be added to add the items you want. If you are someone who really likes to plan their day, in addition to this tutorial, it might be helpful to review some tips for using the organization features in Google Calendar.
How to set up the calendar in Visio
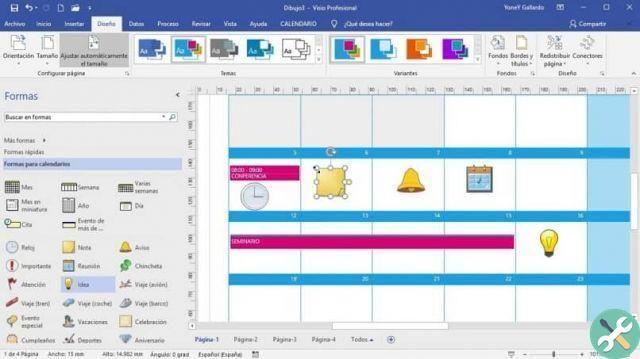
To configure the calendar already created in Visio, you can add events, appointments and graphic shapes to each day or group of days. You will do this by dragging items from the “Calendar Forms” panel to the calendar.
Drag the item you want to add to the day of the week. Then, in the “Settings” dialog, add the details of the appointment or event. Select the start and end day and time, place, subject, and other specifics related to the appointment or event.
Finally, click "OK" and you will see how the title and details of the event appear on the selected day of the calendar. Furthermore you can add graphic icons to help you highlight an event during the day in the most striking way. Drag them from “Calendar Shapes” and drop them on the day of the week you prefer.
If you want to change an event or reconfigure it, right click on it and select “Configure”. The dialog box will open again where you can edit the details of the event or appointment.
If you are adding events to a full year calendar, you need to use the “Calls” option. Where you can also add an event, appointment or event of more than one day and configure it. Then this will appear in a box outside the calendar with a dotted line up to the day of the event.
There are many configuration and display options that Visio offers you to configure your calendar. For example, in the tab "Design" you can select the color combinations you prefer. Also, you can change the contrast to make the calendar items stand out. And if you have an Android phone, don't hesitate to check out the best virtual agendas and calendars so you can organize your plans from your mobile too.
Without a doubt, Microsoft Visio is a great tool that allows you to quickly and easily design and configure organization charts, exchange ideas, and even create basic flowcharts. It has an easy to use interface. Use it to create or configure your calendar in Visio in a few simple steps and without complications.
TagsTutorial


