Undoubtedly being able to upload photos to Instagram from a PC or computer is one of the great needs or requirements that many users would like to have in order to be able to use Instagram from their computers with greater properties and without the limitations that until today, unfortunately, Instagram maintains to the detriment of its use on PCs or computers. Well, in this circumstance we bring salvation, with an article entitled: how to upload photos to instagram from pc or computer without downloading anything that allows you in a good and uncomplicated way, add or add photos to Instagram without programs and best of all, absolutely free from Chrome, Firefox and applicable to any browser they use.
* By the way, you may be interested in: How to view Instagram profiles without having an account … >>
How to upload photos to Instagram from PC with Chrome
If you want to upload photos to Instagram from your PC or computer without downloading anything with Chrome, you must first open said web browser from that PC or computer that you will use for this and after that you will have to access the Cover of Instagram and to do so, they can use the search engine of Google or, by typing the URL in the address bar to be able to enter Instagram directly and subsequently, simply log in by entering the access data of your Instagram account and then clicking on the button that says «Log in«.
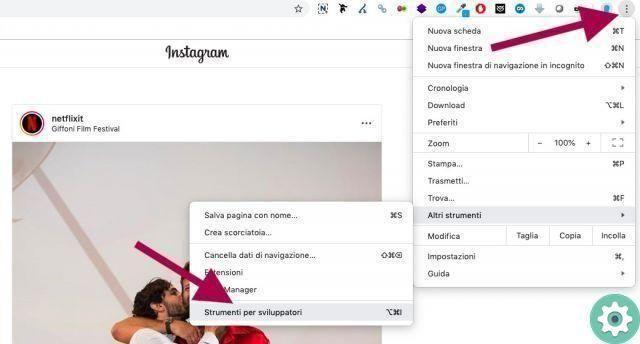
Once they have access to the Timeline of their Instagram, they will then proceed to right-click so that a menu appears and select the option «Inspect» by clicking with the left mouse button or and if you wish, you can execute the commands «Ctrl + Shift + I» which is the same thing.
With the above action, a menu with various resources will appear on the right side of the screen. Well, they have to click on the option «Toggle device toolbar on/off«, which is represented by an icon with the figure of the devices and can be seen in the bar above this menu (see attached image) or, if they want, they can choose to use the commands «Ctrl + Maiusc + M«.
So now and if everything went well, open the slightly changed Instagram size or format on your PC screen and what you should do here is click on the text that says «Responsive» and which is in the upper left toolbar and with it, a menu will appear and you will be able to choose the mobile device with which you want or want to view Instagram (see attached image). In the case of this guide, we have chosen the Galaxy S5 which will bring about a small change in the way the Instagram Timeline is viewed.
Well, now they will see their Instagram as it would be seen on a mobile device they have previously chosen and what they need to do now is essential to being able to upload photos to Instagram from your PC and that consists when refreshing or reloading the page I'm on from your Chrome browser by clicking on «Load page again» represented by an arrow icon rotating in a circle located in the Chrome browser bar (see attached image).
By loading the Instagram page again, the Instagram buttons will appear at the bottom of your Instagram which is displayed on the PC and now you just have to click on the « buttonCharge» of your Instagram (see attached image).
With the previous click the window «apri» which will allow them to search and locate the photo they want to upload to Instagram from their PC and when they have found it, they select it with one click and then click on the button «apri» of this window so that the photo is loaded.
At this moment, the uploaded photo will appear on your Instagram and you will have, on the one hand, the options to modify that photo that you have uploaded and that is to zoom in or out the photo and rotate it with the icons that appear on the left and right ends of the photo of the screen and on the other hand, have the option «Filter» which appears at the bottom of their Instagram and which will allow them to add any effect they want and after they have had the chance to do so, they will click on the text which says «NEXT» and which can be seen at the top right of your Instagram.
In this next step, you will have the option to add a comment or description of the photo in question as well as add some hashtags, names of friends and below, the option to add a location if you find it relevant and when you have this ready they will click on the text that says «Share» located at the top right of their Instagram.
Hey! Once the above is done, the photo is published perfectly and without any problem on Instagram and can be seen from now on, on your Instagram profile. Now, if you like, you can leave the display format on your mobile device and leave it in view of your Instagram on PC.
Finally, this is the procedure on how to upload photos to Instagram from your PC without downloading anything or without programs that need to be downloaded for this and, finally, using the Google Chrome browser.
How to upload photos to Instagram from PC with Firefox
If you want to upload photos to Instagram from your PC or computer without downloading anything with Firefox, you have to open precisely said browser from your PC or computer and after that, you have to access the Instagram home page or cover using a search engine for it or else, by entering directly with your URL and after that, log in or access your Instagram account by typing your access data in the corresponding fields and, finally, a click on the button that says «Log in«.
Now, once you are in the Timeline of your Instagram from the PC and using Firefox, you must click the right mouse button so that a menu with different options appears and with a left click, you will select the option that says «Inspect element«.
While performing the above process, a sort of menu will appear throughout the bottom of your Instagram's Timeline screen. Well, precisely in this menu there is the possibility of viewing Instagram in mobile mode from the PC and that is something fundamental for being able to upload photos to Instagram from the PC and without downloading anything.
Well, to view it in cellular mode, you must click on the option «Adaptive design view«, which is represented by a mobile phone icon and which you can see to the right of this type of menu (see attached image) or if you prefer, you can choose to press the commands «Ctrl + Maiusc + M» to bring up the adaptive design view.
If things went well, the responsive design view will open and the Instagram screen will be displayed in another format. So now they will have to click where it says «there is no device selected» that they will find it at the top of the new view of the Instagram page responsive design and with it a menu with different options will appear and they will have to choose with one click the mobile option that they consider convenient or that makes them more comfortable and then upload a photo to Instagram. In the case of this guide, the Samsung Galaxy S7 was chosen (see attached image).
Perfect, they just put Instagram in a mobile view and now I am able to upload photos to Instagram from the PC with this system and for this you will have to click on the square icon that encloses the «+» that is, below and used to upload photos to Instagram (see attached image).
Hey! With the previous click, the classic window should open «File upload» of Firefox and they will be able to search on their PC or computer for the photo they want to upload and when they find it, they will click on it and then click on the «apri» of this file upload window (see attached image).
Once the previous action has been performed, you will be able to upload the photo in question to your Instagram without any problems. Now and if they want or deserve it, they can change it with the buttons to make the image smaller or larger and with the Rotate image button located in the respective left and right corners of the photo they have uploaded and after that they will click on the text that says "NEXT» (see attached image).
Now you have the option to enter a description or comment related to the photo precisely, where it says in gray letters «Write a caption to the photo…» and also you can add a hashtag, friends names and below, you have the option to add location in «Add location» and after they have optionally done that, they will click on the text that says «Share«.
With this procedure you will be able to add a photo to Instagram from your PC and you will be able to see it as a follower on your Instagram profile. Now and if they want, they can continue in that mobile phone format or go back to the PC Instagram format.
In short, this is the whole procedure of how to upload photos to Instagram from your PC or computer without downloading anything for it or anything, without any strange programs and using the Firefox browser.


