iPad and Apple Pencil are the perfect combination for drawing or writing notes on the go. There are a number of apps to take advantage of that tandem, but it's hard to beat Apple's Notes app.
However, using the application as it is has disadvantages compared to standard paper and pencil for taking notes. The main drawback is the difficulty of keeping things straight while drawing or writing.
If you're going to write a lot of text, you'll probably appreciate a few lines to keep everything clean. If you are drawing graphs, plans or other things, you may want to have a grid, not a simple white lighted screen.
In the same way that we can buy lined paper and graph paper to help us draw in the physical world, we can use the same elements within Notes to refine our ideas.
Lines and grids in New Notes
The instructions for adding a background to the note are the same for the iPhone and iPad versions of the app, despite the different screen sizes.
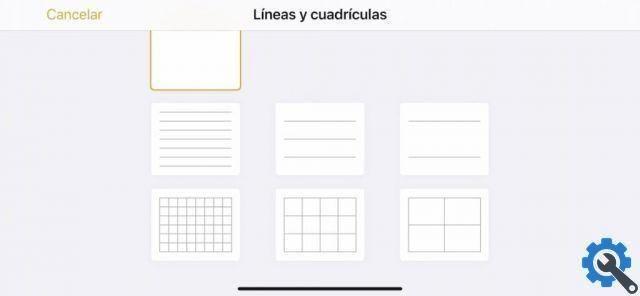
How to add lines and grids to a new page in Notes for iOS and iPadOS

- On a new blank page, tap i three points in the circle in the upper right corner.
- Tap the option Lines and grids.
- Touch it background you want to add to the document.
- The selected lines or grid will be added to the page.
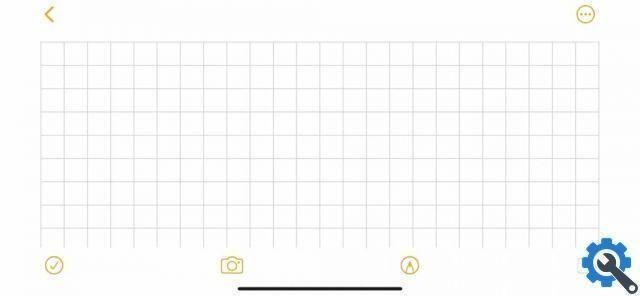
The background is independent of the content you draw on it, so you don't have to worry about lines or grids that need to be part of your note unless absolutely necessary. They can always be removed later.
The process is the same for Notes on the iPhone and iPad.
Lines and grids in existing notes
The process is very similar but slightly different if you want to add lines to an existing page. The only real change is that when you tap the three dots, the options for sharing the page are displayed.
How to add or edit lines or grids on an existing page in Notes for iOS and iPadOS

- On one page, tap three points in the circle in the upper right corner.
- Tap the option Lines and grids. Usually this will be the last option on the list.
- Touch it background you want to use in the document.
- The selected rows or grids will be added to the page, or the rows or grids that have already been added will be changed with the new option selected.
The ability to change the lines and grids used is useful if you need to combine multiple types of data written in one note. For example, you could use lines to write text, but then switch to a grid to create a graph and then go back to lines to continue writing.
This process is required to remove any rows or grids added to a document. Doing so will leave only the text or drawings in the note, unaffected by the removal or changes to the background.
Default grids in Notes
Let's say you don't want to be faced with a completely blank page every time you open the Notes app and you want a grid or lines to be available for use from the moment you start a new page.
You can set any row or grid option as the default for new notes.
In the Settings app, you can configure which lines or grid will be included with each new note by default. You can always change the background you use within the app itself for a specific note, but this will ensure that a specific layout is used when opening a note.
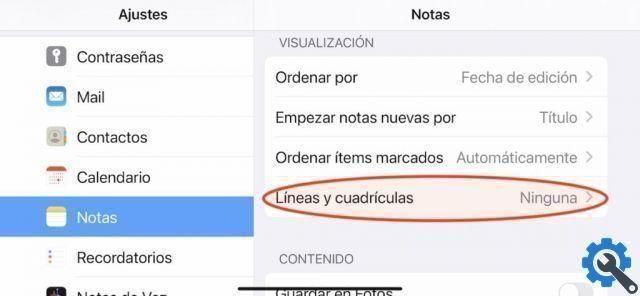
How to set default lines or grids for Notes for iOS and iPadOS

- Open the app Settings.
- Scroll down and tap Notes.
- Toccata Lines and grids.
- Select it style you want to set by default.