Sell on Facebook it's a smart move. The competition can be fierce, but with over 2,6 billion monthly active users, the audience is more than enough to go around. How create un shop su Facebook?
Facebook Shop is the latest e-commerce update from Facebook, elevating traditional Facebook Page stores into something more customizable, purchasable, and cohesive — and we're here for it.
What you need to use Facebook Shops
►Read: How to Know Who Follows Me on Facebook: Steps and Tips!◄
Please note that in this guide we will walk you through the process of creating the Facebook shops.
If you already have a Facebook Page Shop and a notification from Facebook that the Facebook Shop are ready for you, this is a simple three step process.
Facebook shops like features they are only now starting to be implemented. Facebook will contact you if it's ready for your store.
To get started, you need to create a Facebook shop. We know we've used a few similar terms at this point (blame Facebook for their unoriginal names), so let's cover this quickly:
- Facebook Page Shop – Existing Facebook functionality that allows you to display products on your Facebook business page. When customers click on your products, they have the ability to check out your website.
- Shops of Facebook – New feature that provides a shop to existing shops on the Facebook page, giving customers a smoother experience and the ability to check out without leaving Facebook if they wish.
To get started with Facebook Shops, you'll need:
- 1: A Facebook shop page. Details of what you need are below if you don't already have one.
- 2: A notification/email from Facebook that the Facebook Shops feature is available for your shop. It is currently arriving in US stores first.
Since Facebook Shops are only available to those who have a Facebook Page Shop, let's take a look at what you need to set up one:
To create a Facebook Page shop, you will need:
- 1: Become an admin of your company page. Here's a guide on how to create a Facebook business page if you haven't already.
- 2: Sell a physical product. Facebook does not currently support the sale of downloadable products or services.
- 3: Accept Facebook's terms of business. Make sure you read them carefully.
What about the Facebook Marketplace?
Facebook Marketplace is a great alternative to setting up a Facebook shop if you're just looking to sell a few items you no longer need. It works similar to sites like Craigslist, but can be accessed through your Facebook account.
To get started, go to Facebook Marketplace and hit the button in the left menu that says + Sell Something, then follow the onscreen instructions.
How to set up Facebook Shops
If you already have a Facebook Page Shop (and if you don't, we'll explain how to set it up below), here's how to set up the Facebook Shop once you've gotten the green light from Facebook.
How to Enable Facebook Shops in 3 Steps:
- 1: create an account with Facebook Commerce Manager…
- 2: create a collection
- 3: Customize your showcase
- 4: Publish your shop
Let's take a look at what exactly each step entails:
Create an account with Facebook Commerce Manager
You may already have an account with Trade Manager, but if not, here's how to create one.
Go to Facebook Commerce Manager and you should see a screen that looks like this:
Click on the blue button « Start selling«. Then you will see this option:
We'll cover using an ecommerce platform later, but to create a Facebook shop, tap Get Started with Facebook on the left. Then you will see this summary of requirements per i shops of Facebook:
The Facebook Store rollout is starting in the States United, therefore bank details are required US. and tax information.
Readers not US, don't despair, Facebook Shops are coming soon and in the meantime, you can skip to the section below to create a simple Facebook Page Shop.
Clicking Next takes you to the following screen:
Start by clicking Set up for your business information.
Next, you'll be guided through the process of choosing a name for yours shop, linking your Trade Manager to an existing page (or creating a new one) and verifying that you have a Commerce Manager account.
We won't go over each of these stages here: Facebook does a great job walking you through adding products and payment details to your account, so as long as you follow this guide, you won't go too far wrong!
Create a collection
Your products should be grouped into « collections» to get the most out of Facebook Shops. To create a collection, log into your Commerce Manager and click Create Collection.
For each collection you need to add:
- 1: a collection name. It can be up to 20 characters and include emoticons to make it more fun.
- 2: A description of the collection. You have 200 characters for this one, so make it count! We have a guide to writing product descriptions that will help you.
- 3: Covers support. In addition to product images for each item, you'll need an image to serve as the "cover" for your collection. It should have a 4:3 aspect ratio and a size of 1080 x 810 pixels.
Once you're done, you can add more collections (click Create another collection) or move on to the next step: customizing your store.
Customize your showcase
This is where i Facebook shops they really come into play! You have the ability to customize your store, making it feel more like "you" and less like "Facebook."
When you customize your store to be ready to go live, return to the Commerce Manager (if you're not already there).
Click Stores and select the store you want to edit (if you have more than one). Click Edit.
You will see two tabs within the chosen shop:
- 1: Layout: Here you can choose to show collections as the foreground and add carousels of other collections.
- 2: Style: Here you can adjust the colors, button size, and text to align your shop with your branding.
Publish your shop
See what your page will look like in Shop Preview, and when you're happy with everything, click Public.
Facebook will examine e will approve your collections downtown 24 gold. You can select whether you want them to be published when approved or all at once.
How to create a Facebook page shop
Until Facebook Shops become more widely available, creating a Facebook Page Shop is still your best bet.
This way you can start selling right away and easily connect to the Facebook Shops feature once it's available to you.
We will walk you through the process of setting up a shop for our fictional brand, Testing Tshirts. Again, let's assume you already have a Company Page ready to go.
You also have to work from a laptop or desktop to be able to set it up.
- Go to the "Shop" tab of your business page
You'll find it at the bottom left (you may need to expand the menu to see it).
Next, you will be asked to read and agree to the Facebook Merchant Terms and Policies.
- Fill in your tax/payment details or select a payment option.
This is where things start to diverge a bit depending on where you are in the world.
add products
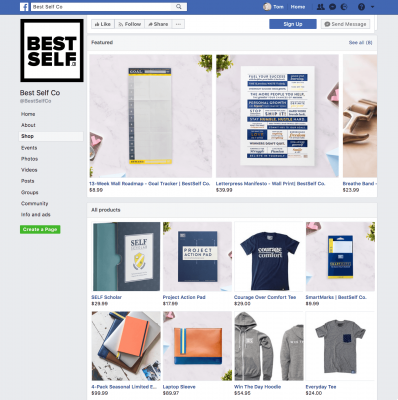
Now we're all back on the same path, and whether you're based in the US or anywhere else in the world, you should see a screen that looks like this:
To start adding products, click the blue Add Product button.
To add a product, you will need to have product images, product price, product description and name, as well as a customer checkout link (usually the product listing on your website).
If you've chosen to sell through Messenger, you don't need to add a link here.
Here's how we filled ours:
If you want to share the product directly on your page as a post, select this option.
This is great for later new releases, but we'll leave that for now as we're adding all of our existing products at the same time. When done, click Add Product.
A note to US readers! You'll have a little more information to add at this stage, including:
- 1: Options: Here you can add variations such as color or size
- 2: Inventory – by adding the number of shares you own, you will never accidentally sell
- 3: Shipping Options: You can choose how to ship this product, and for how long, from the options you added during setup
After adding a product, it will appear as "Processing" while Facebook verifies that your product complies with their policies. Must be approved and displayed in your shop within 24 hours.
Your new item will appear here and you can click +Add Product again to add more.
Organize products into collections
Once you've added your products, we recommend organizing them into collections to make it easier for customers to find what they're looking for. It's up to you how you want to do it, choose what seems best suited to your brand!
We will add these two products in a collection of «Men's T-Shirts». You will see the option to add a collection under your new products:
Click Add Collection, then + Add Collection.
Give your collection a name (this will be the name it appears under in your store), then add the relevant products:
If you're based outside of the US, you're pretty much done at this point in terms of logistics.
You can continue to add and remove products depending on stock levels, and any sales will take place via Messenger or on your website (whichever you selected at the start).
Even if you start using Messenger for your sales, we recommend building a website at some point and switching to this option. We promise it's not as daunting as it might seem!
Manage Orders (US Only)
If you're setting up shop on a Facebook Page in the US, adding and grouping your products is just the beginning - you need to know how to actually manage and deliver the orders that come in!
You can manage your orders by going to Publishing Tools (in the top menu):
Then, select Pending Orders from the left menu:
When orders arrive, you will be able to see them here and update their status as you progress through the shipping process:
You can also schedule and review messages in the Messages section. This is useful for organizing messages in advance and for checking people's engagement with them:
Manage Facebook Shops from an ecommerce platform
If you have an eCommerce site, we recommend syncing it with your Facebook shop as soon as possible. This will allow you to check your inventory on both platforms from one place and send any updates to both stores, thus cutting your handling time in half.
We'll give you a rundown on how to sync Facebook Shops with two of the most popular eCommerce platforms: Shopify and BigCommerce.
Integrating Facebook Shops with Shopify
Shopify has advised that if you can already use product tags on Instagram, you will be the first to access Facebook shops.
Either way, to make sure your shop is ready when Facebook Shops go live, make sure you add Facebook as a sales channel.
Shopify will walk you through the process of syncing your Facebook Page store and your Shopify site.
Integrating Facebook Shops with BigCommerce
It's a similar story to BigCommerce. To be in the best position for when Facebook Shops are available to you, we recommend integrating your Facebook Page shop with your BigCommerce shop now.
To do this, download the BigCommerce Facebook Store app, which will walk you through the process of syncing both stores.
►You May Also Like: Top 10 Facebook Password Finder Apps◄
Conclusion
In this article, we walked you through Facebook's new feature, Create a Facebook Shop, and showed you how to set it up. If Facebook Shops has been made available to you, installing it is very simple.
We hope you like our article, if you think something was missing, please leave your comment