


One of the methods currently used in editing is the use of vector graphics. This essentially consists of the create objects or images from geometric figures, to obtain precise finishes.
How to create the glass effect on objects with Corel DRAW?
One of the programs that is currently based on this method for design, edit and create graphics and Corel DRAW, that we can easily download and install. Since its launch in 1989, it has evolved over the years, becoming one of the leaders in documentary editing.
It is a program with which we can perform multiple activities, from creation of simple documents to the web page design complete, allows us to insert custom effects on text and background, correct the blurred appearance of a photograph, put and apply different shadow and silhouette effects to a text. All this through tools designed specifically for each task.
Corel DRAW uses mathematical formulas within your system to get accurate results in your creations. On the other hand, we can perform all kinds of effects, one of these is create the glass effect.
This effect basically consists of giving objects a crystalline effect, per questo dobbiamo usare gli strumenti correttamente. In questo articolo impareremo come applicare questo effetto vetro agli oggetti.
Steps to create the glass effect on a sphere
The first thing we need to do is open the Corel application, now we have to create objects a to which we will apply this effect. We can also create the glass effect on objects that we have already created previously.
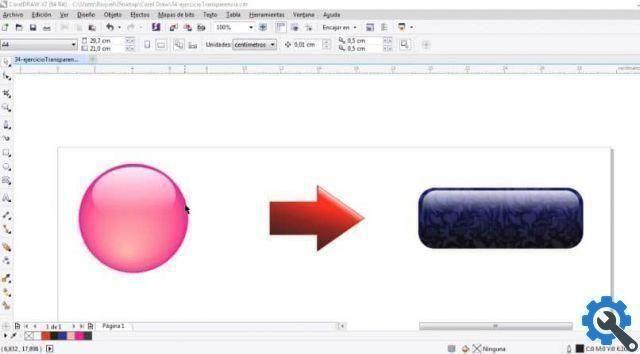
Depending on the object to which we want to apply the glass effect, the method varies, for example if we want to create a sphere. First we need to draw two circles, one of the size that that sphere will have and a smaller one that will be inside it.
The next step is select the "Blend" tool located on the left bar of the screen. We select the smallest circle and holding down the right button drag in the sphere.
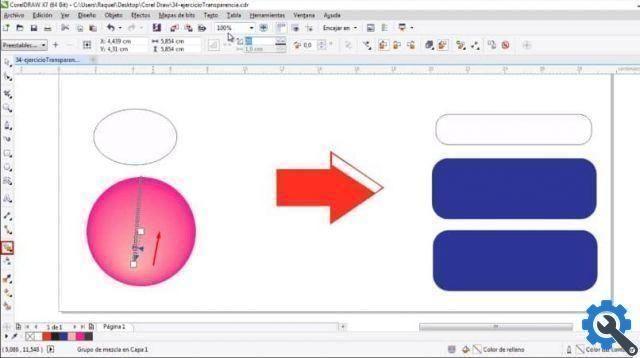
In the top bar we can change the color to our liking, now we have to create an ellipse which will be at the other end of our circle. Once identified we select the tool transparency, located on the left of the screen.
In the options above we mark the option "Transparency with gradient", there we can configure the gradient we want it to have, by moving the indicator that appears. Finally, we need to select everything and press Ctrl + C to group.
Steps to create the glass effect on other objects
Depending on the object we are working with, the method that will be used changes, for example if we want to apply the glass effect on an object with straight lines. The best practice is to apply a fountain fill to that object.
For this we select the tool "Interactive filling" located on the left of the screen. At the top we mark the option "Gradient", depending on the color we are working with, we apply the gradient to our object.
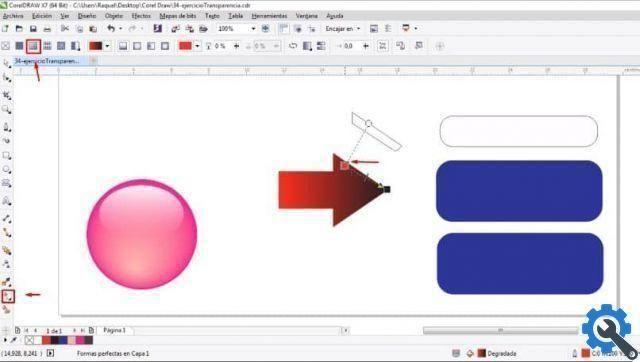
In order for the glass effect see, we must work with at least two shapes. One is the shape of our object and the other is smaller than what will be on one side of our image. The design of the second form will depend on the object we are working with.
Having that clear and already created the second shape, we place it on one of the sides of our object. A transparency will be applied to this with the tool "Transparency" located on the left of the screen.
So we mark the option "Gradient" up; It is always recommended to work with a white fill to make the effect much better. Therefore let's configure the gradient until we get the glass effect we are looking for.
Once done, the last step is group all our objects. To do this we select everything and press Ctrl + C to create a single object.


