


It turns out that there is no button in “Image Tools” that gives us this effect, this may force us to have to use a separate image editor to reinsert the image into the presentation. But here we can save you all those jumps with a little trick that you will use, without problems, the next time you want create image trasparente in PowerPoint.
How to make a picture transparent in PowerPoint
First, keep in mind that this is optional. You're probably happy to edit images outside of PowerPoint and then insert them into your presentation, but we'll give you immediate help here because there are times when there isn't much time to edit:
• When you are in the sheet PowerPoint startup, go to the toolbar at the top of the screen and click "Insert".
• Then click on “Shapes” and choose the shape of the rectangle.
• Draw it on the sheet by clicking and dragging the mouse from left to right. Once you have it, give it the closest shape to the image you want to insert.

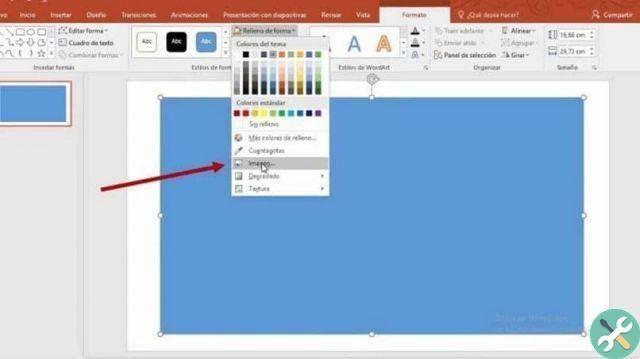
• In the toolbar you will see how the "Drawing tools". On your right you will get an option that will say "Fill form", where you will click.
• Then click on “Image” and a box will appear where you need to click on the “Work Offline” button, so that you can take the image from your PC.
• As soon as you choose your image, it will appear inside the figure you have chosen. Then click on "Drawing Tools".
• There you will look for a space called "Styles of shapes". Click the small button on the right side of that space, located at the bottom edge of the bar.

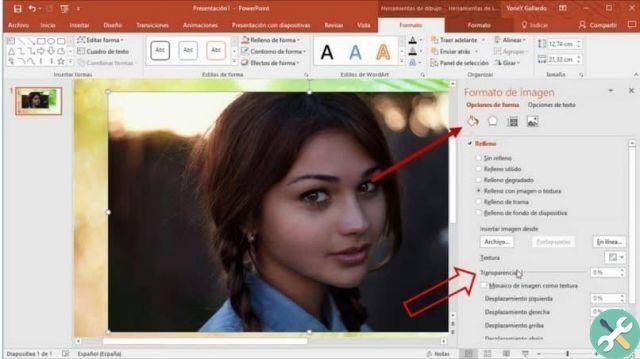
• An options window will open to your right, where you click on “Fill and Align”, which is a paint can icon.
• You will click on “Fill, where you will find“ Transparency ”, a button with which you can move and define this effect in your image.
As you see, you can render the transparency of a PowerPoint image without exiting the program, thus avoiding having to jump from one place to another, editing and saving images unnecessarily.
How to add a background image to a transparent image in PowerPoint
After following the steps above, you may have the idea of placing a background image to create better contrast with the newly edited image. You can do this without having to go back to the beginning by using the following tips:
• Drag the image you have already edited to your right, it doesn't matter if it leaves the sheet.
• Go to the top right of the screen and, in the toolbar, click on “Insert”.
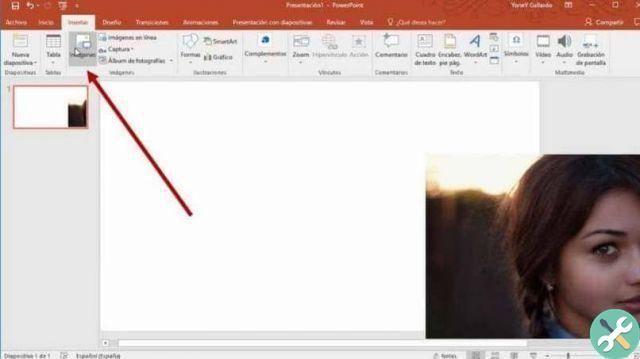
• Next, click "Images" and select the wallpaper of your choice in the browser.
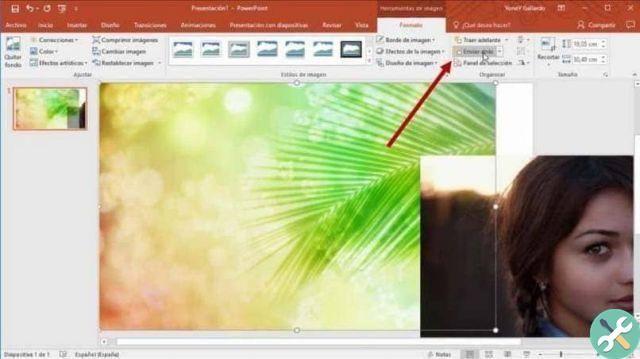
• After selecting it, go to the toolbar where “Format” will be displayed.
• Press "Send Back" and your background will be behind the image you have already edited.
• As a result, you will be able to arrange the image you placed on your right over what is now your background image.
PowerPoint will continue to be practical for you to use and thanks to these little tips you will be able to do multiple tasks in one place. saving time and energy. Don't forget, keep reading our blog, where you will always learn to do new things.


