


Little by little it is improving, and all this is a matter of practice and knowledge that is accumulating little by little. In fact, we recommend that whenever you find yourself in this one field of work, you practice and seek knowledge with what you can.
And that's why we present you a small tutorial. What better way to expand our knowledge than through something fun? Through the drawings you can easily learn how to do what you like.
Whether it's drawing series characters we like or whatever, it can take a lot of practice in a short time. And that's why we're going to show you how to create a mandala using Corel Draw.
What is a mandala?
A mandala is a series of concentrically joined shapes. You can see all kinds of geometric shapes in it. And they are often used to be able to perform one representation spiritual of some kind.
They are commonly used in Hinduism and in Buddhism, where colored sands are often used to make them with great skill. But making a mandala has no rules outside the symmetry. There is no need to use specific forms and it is really quite free.
However, a pattern is generally followed from the center out, using different shapes and patterns at each level. Ultimately, it ends up being a very fun way to draw or illustrate, as well as take new concepts from a Program of editing or illustration.
How can you create a mandala in Corel Draw?
Making a mandala using Corel Draw it can be an extremely fun process. Since you can run them in both Corel Draw and Corel PhotoPaint. It doesn't have many steps to follow and really everything that is done depends on the person, but we can give you some types to start from. Take a look at the following step by step and get inspired by it:
- To get started, you can start by creating a small design that involves using the spiral shape and curves.
- Once done, you can decorate it a bit with a brush to your liking and then maybe remove the original lines or leave them to your liking.
- Next, it's a good idea to activate the lines guide area of grill on sheet, which we recommend that it be completely square so that the grids are completely even.
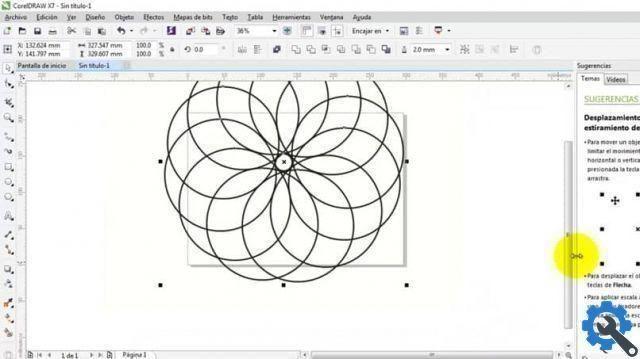
- Now you have to take the shape you created, duplicate it and reflect it on the other so that you have the opposite image in front of the original.
- Next, locate where you want the mandala's outer circle to be at the top center of the grid.
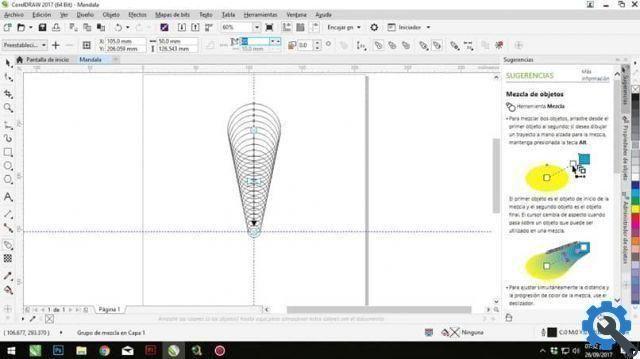
- And, using the tool Transform in floating windows, in the Rotate menu; use the Rotate and Copy tools so you can create the first outer circle of the mandala.
- You can change these values until you are satisfied with the symmetry.
- Do the same step with the inner circles and you will have your mandala ready to be colored to give it more life.


