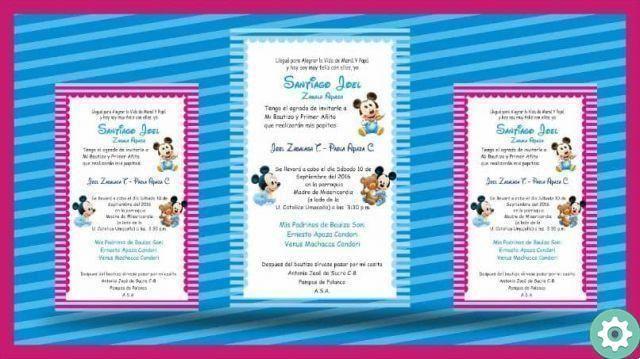
As we have said many times, you can do anything you can imagine with the Corel Draw graphic design application. And if you just thought you could accomplish visual effects like a pro, you are wrong.
Since in the next tutorial we will show you a tutorial that will blow your mind and you will learn how to make printable christening cards or invitations using Corel Draw.

Doing these kinds of projects is a lot of fun and the best part is that you can add personality to your creations. As you may recall, we taught you how easy it is to add and configure the gradient fill in a shape using the fabulous Corel Draw application.
But you will see how easy it is to create or make baby shower cards or invitations to print using Corel Draw. And for that, you have to follow the instructions we will give you to the letter. We assure you that you will have a lot of fun and maybe who knows, you will dedicate yourself to using this learning as the start of a working career.
How to create printable christening cards or invitations using Corel Draw
The first thing from to make printable christening cards or invitations using Corel Draw. You go to the application and Create a new document, for this go to the main menu and select the File tab and then click on New. Or you can also use keyboard shortcuts, for this you have to press Ctrl + N.
In this new document you have to change the orientation of the sheet to Landscape, since ours paper will have two sides, we will create another page. For this we will go to the bottom left and select the + sign icon. And so we will have two blank pages to start realizing our project. With these same principles we can create a business card.
The next step will be to create a colored background, this or we will do it by going to the tools menu located in the side panel. And we'll double-click the Rectangle tool, then we will fill in this shape. To do this we will go to the color palette, select a color and make a left click.
Now in this colorful background we will create the figures we like the most, we can also put colored stripes on them. We will do this with the Rectangle tool and place it in the desired point and thickness. Then we will add the color we like best from the color palette, if we want we can repeat this procedure to add more strips of color.
Using the different editing tools in Corel Draw
If you want to create animals or monsters, you can use the tools in the box of instruments to create simple shapes. Or you can also do them freehand, you will also have the Artistic media tool. With it you can make drawings that look like they were done with a brush, with this tool you can create eyebrows.
If you want to use the Freehand option you have to go to the Toolbox or by pressing the F5 key. If you have made several objects and want to group them, you just need to press the Ctrl + G key, ready now we will add some text to the card. To do this, we select the text tool or press the F8 key.
Now you need to make a clip on the sheet and write the text, then with the selection tool you will select the text and edit the font type, color, size, style, etc. When you are done creating your design on both pages, you need to save it. So that you can print it later.

save your design, go to the main menu and select the File tab, then click Save. When you do, it will show you the save window if you need to save it as a .CDR file.
You have to save it in this format, so you can edit it at any time, but if you plan to print it you can save it in PDF format. With these few steps you have learned create printable christening cards or invitations using Corel Draw.


