


How to insert pictures in Word?
Word has two options for inserting images ; the first is to insert the images you have saved on your pc or search for images directly from the web.
Steps to insert an image from PC:
- Have the Word document open.
- Go to the tab "Insert" of the toolbar.
- Click on the option "Images" and a window will open with the images you have saved on your PC.
- Select the image by double clicking on it.
- The selected image will immediately appear in the document.
Steps to insert an image from the web:
- Go to the tab "Insert" of the toolbar.
- Click on the option "Images online", a tab will immediately open allowing you to search for an image on the web.
- In the option "Search for Bing images" you will find a box called Search in Bing; In that box, write the name of the image you want to insert into your document and double-click on it.
- A series of images will appear, click on the image you want to insert (you can select more than one image).
- Now you have to press the button "Insert" located in the lower right part of that window.
- A small window will appear indicating how the image download is going, when the download is complete, the selected image will appear in the Word document.
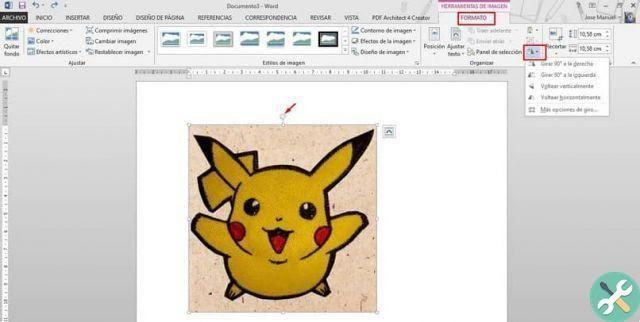
When you insert the image (online or from your pc) the “Format” tab will appear in the toolbar, this option will help you make changes to the image. You can click outside the image to make this tab disappear.
How to edit and edit pictures in Word?
Word offers you a variety of options for edit and modify images that you enter if you want to group them and you can also add text on the image so that you can identify it, so that they have that original, artistic and authentic touch that make the document stand out. Here are some of these options:
- Click on the image so that some squares (controllers) appear around the image.
- Now you need to click the left mouse button on any of the squares and drag the image to the desired size. (To make it smaller, drag it in and out to make it larger).
You can also adjust the size from the toolbar; Click on the image and automatically the toolbar will be placed in the "Format" tab, in the "Size" group you can enter the values you want for the height and width of your image.
- Click on the image so that the toolbar changes on the tab "Format".
- Now you need to press the option "Remove background" and you have to choose which parts you want to remove from the image.
- Finally, press the tick icon to complete the process.
- Click on the image and go to the toolbar that will have the tab "Format" open.
- Choose the option "Artistic effects" (this option will allow you to give an artistic or sketch effect to your image) you have to choose the effect you like best.
- Click on the image and the tab will appear "Format".
- Choose the option "Color" and choose the color or tone that suits your image. And you can even make your image transparent thanks to Word's tools.
- Click on the image and the tab will appear "Format".
- Select "Global aspect of the image".
- Hover over each style that the gallery offers you to see a preview of each style.
- When you decide which one you want, click that style in so that the image adopts that style.
All these tricks will help you edit the image creating a striking appearance. Rejoice! use Microsoft Word as this software allows you to perform endless tasks they will do stand out the your document, you can even make photomontages without the need to install applications.
TagsParola


