Therefore, there are a variety of programs that can help us make a backup easily and simply. Today we will learn how to make a backup or backup on Mac with Time Machine. In connection with this article, you may also be interested in How to protect my Mac calendar with a backup.
The criteria and preferences that we can find when we make a backup of our computer's files, configuration and programs are different. There are those who prefer to do it manually, without using programs.
Others rely on finding suitable software that can facilitate the task in many ways, saving time and effort. However, with the passage of time, many operating systems have included programs and functions in their native applications that allow you to easily make backup copies so that you don't have to recover deleted files after formatting your PC.
This is the case of Mac OS which has integrated the Time Machine application, a function of the operating system that allows us to make copies di automatic backups of our documents, photos, videos, music, programs, and even system files. Once done, you can restore this backup to your new computer or in case the files on your hard drive get deleted or damaged or you need to replace it. Let's see how to do it.
Requirements for backing up with Time Machine
First of all, you should know that in order for your Mac to make a backup copy to an external device, it must have a specific file format compatible with the operating system.
Time Machine does not allow backups to iOS devices or hard drives formatted for Windows. If the disk you have is not using the correct format, Time Machine will ask you to erase it when you connect it to your Mac.
For this reason, we recommend using more suitable devices to make backup copies with Time Machine on Mac, among these we can mention USB Thunderbolt or FireWire drives, an external drive connected to an AirPort Extreme base, an AirPort Time Capsule or any other device network attached storage supported by Time Machine via SMB.
With these devices you will have the guarantee that your backup is done correctly and you can use it without difficulty wherever you want to restore it.
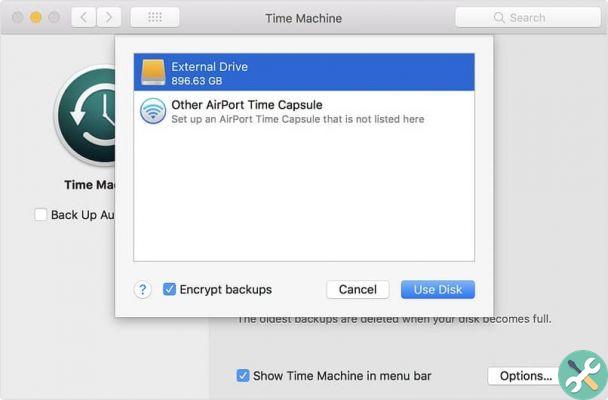
When you connect your storage device to your Mac computer, you may automatically see a dialog asking if you want to use it for Time Machine backup.
In this case, select the “Encrypt Copy Disc” option, it is the most recommended. Then, click the “Use this disk” button. In case the drive is not recognized automatically, below we explain how to enter Time Machine, manually select the disk and configure the backup according to your preferences.
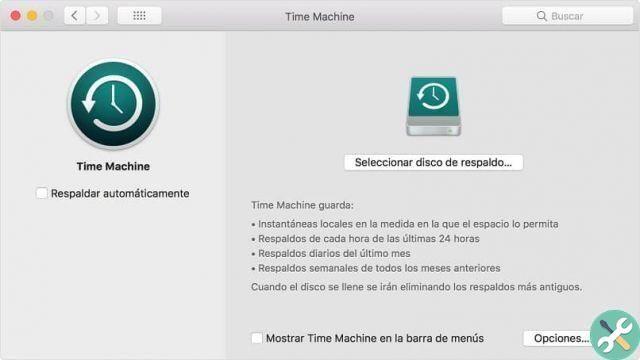
Backup su Mac con Time Machine
To open Time Machine, press the CMD + spacebar keys to open Spotlight and type in the search bar "Time Machine", click to run the application.
You can also enter Time Machine by selecting the Apple menu, then go to "System Preferences" and finally click on “Time Machine”. Then, plug in the drive or external device that you will use to make backup copies.
Within the application, click on “Select backup disk”. In the dialog that appears, select the external storage drive connected to your Mac from the list of available drives.
Select the "Encrypt backup" option and click the "Have disk" button. If the disk you selected does not have the correct file format for Time Machine, the application will ask you to erase it to continue. This will erase all contents of the external drive.
Immediately, Time Machine will start periodically perform automatic backups. In Time Machine's “Preferences” you can select which items will be backed up and thus have a reliable backup at all times, without complications.
TagsMac


![Apple Vice Presidents Talk About Development of M1 for Mac [Updated]](/images/posts/c6254b668e5b3884d6b6338ccb8a02ff-0.jpg)