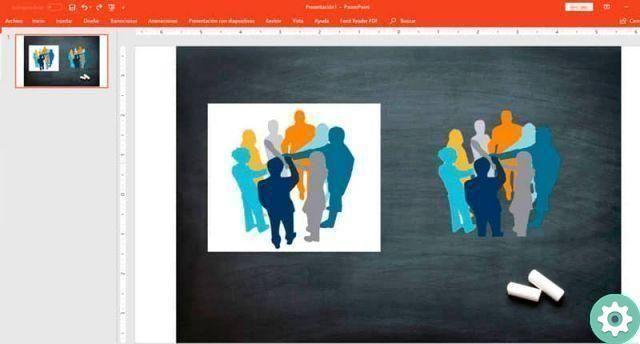
Photomontage is defined as the technique used to create an illustration, made up of a group of images. It's amazing that with an easy-to-use tool like PowerPoint you can create illustrations.
Microsoft never ceases to amaze. Your office suite offers so many tools that with the right knowledge you can do just about anything.
How to create a photo montage in PowerPoint?
To begin the process of creating a photo montage you just have to keep two things in mind. The first is to have PowerPoint installed on your PC and the second is to have the images you want to insert.
What kind of images should I use for photomontage?
The images that are used by default to make a photomontage are usually in PNG format, because they are images they have a transparent background. If you have it in this format, the most recommended is to turn the image into PNG.

You can identify the image format by simply clicking on the image and hovering over it with the mouse. You can still do this by right-clicking and selecting the "Properties" option.
Insert images into PowerPoint
After choosing the images you want, in the PowerPoint menu select the tab Insert - Pictures.
Add a background
You can start adding the background. The background does not need to be in PNG format, in this case you can use a JPG file.
The images to add to the slide can be resize to your liking or adapted to the size of the work area.
Add the PNG images
As the background has been inserted, the images are added, but in PNG format, so that the print image that belongs to the background and look professional.
If necessary, you can crop images. To crop an image, you need to select it, click on the tools cut format image.
Remove the background from the JPG image
PowerPoint allows you to remove backgrounds from pictures, but the result isn't as good as it would be with Photoshop.
To remove the background from an image, select Instruments image - Format - Remove background. PowerPoint lets you mark the areas you want to remove and the areas you want to add.
Add effects to images
Photo montage in PowerPoint may also not look good and you need to adjust the images so they have the same tones.
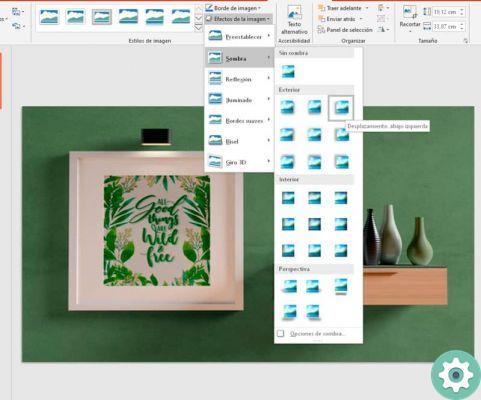
You can add effects such as shadows to the images to blend them and make them look like a single image. For example, you can add shadows in Picture Tools - Format - Picture Effects.

So that the images have the same hue, you can too change the color in the image - format - color tools
Change the position of the image
For a more realistic effect, image may be superimposed to the other. By right clicking on the image you can put in front or behind another image.
Group the images
Once the photomontage is ready, there is only one step left and that is to group the images. Images can be grouped into Instruments image - Format - Selection panel.
The selection options will appear with all the images that are on the slide.
Pressing the button Shift + click on the image name, you can select all those to group, right-click on any of the images and select the group option.
Another simple method
An easy way to group images is click and drag the cursor to select all the images you want to group. Right click on the slide and select the group option.
Save the image in PowerPoint to create a montage
Best of all, PowerPoint allows you to save the image for use on other platforms. You need to click on the image, then right click and finally select the option Save as image. Microsoft Word is also a tool that can be used to create photo montages if you don't have PowerPoint.
PowerPoint can solve more than one problem, and it shows once again why it is one of the most used tools in Microsoft Office. To say it's a slideshow maker is an understatement.


