If you need to help other Mac users you know, there's no faster way to offer support using Messages on macOS. We'll look at how to take control of your Mac and how to let others take control of your computer.
If you need to support users using both Windows and macOS, using the Remote Desktop extension for Google Chrome can be a good alternative (here's an article explaining how to use it). But if the person who needs help is also using a Mac, using Messages is probably the simplest option.
One of the features of Messages in macOS is to be able to establish a remote session on a computer, where you have control over the Internet or, conversely, for someone to take control of your computer over the Internet, to be able to perform actions needed or see where the problem lies.
In addition to being simple to use, it doesn't require you to install any kind of extension or component, nor do you have to uninstall anything after it's done or leave it in the background so that it works again every time you need it.
What is the "screen sharing" feature of Messages for?
When screen sharing starts, the screen of the Mac you are controlling will be sent as a live video source to the Mac which will be used for control. This will allow the user on the Mac who needs to monitor the session to see what's on the computer being monitored.
At the same time, a FactTime audio call is established between the two users, so that it is possible to have a conversation in which each explains the situation or how to resolve it.
This feature does not automatically enable the ability to remotely control the other user's screen, but it can be enabled. If one of the users does not grant screen control, the screen is shared but cannot be controlled remotely.
If so, the remote user could use the mouse to point to areas when clicked, allowing for a pedagogical explanation of what is happening or what needs to be done to fix the problem.
Use screen sharing in Messages only with people you trust
Allowing someone to see your computer on the Internet but not being able to control it can be helpful, especially if you don't have much confidence with that person. It is reasonable for you to have doubts about your privacy if you allow someone you know but do not have a trustworthy relationship with to control your computer, as this may allow them to access documents, images, contacts, etc.
Remember that if you give someone else control of your computer, you are giving them the power to view and / or delete files, access email, view browsing history, etc. Of course, you should never hand over control of your computer to someone you don't trust and leave it alone (with control) while you go to another room (be it the bathroom, kitchen, or answer a call). In such a situation, it is better to say that you have to disconnect to do something and call them back in five minutes rather than letting someone else control your computer without you being able to see what they are doing.
It seems obvious, but let's write it down: if you don't trust someone to control your Mac, don't give them control.
If in doubt (you can always say you'd rather do it yourself to learn), show him the screen but he doesn't check the computer, and use the audio call to instruct you on how to do it while he watches it.
How to share screen in Messages Message
There are many ways to initiate a screen sharing session and it varies depending on which part you are in - whether you are the user sharing their screen or if you are the person who will remotely control it. We will start with the case of the person who needs to share their screen.
How to share your screen with another user in macOS Messages
- apri Messages on the Mac.
- Select the conversazione with the person you want to share your screen with. If you haven't had a conversation until then, send him a message to start one.
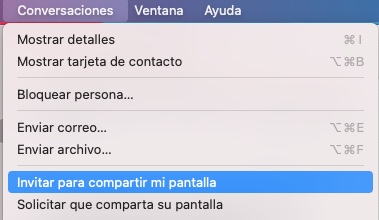
- From the main menu, select conversations and then invite them to Screen sharing.
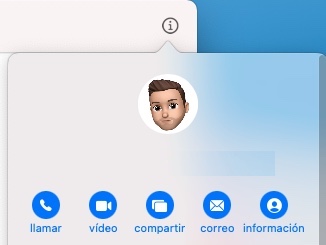
- Alternatively, you can click the button Details in the conversation and select Share and then Share my screen.
- Screen sharing and audio calling will start automatically once the remote user has it accepted the invitation.
How to share your screen with another user by invitation in macOS Messages
- Click on Accept in the invitation notification.
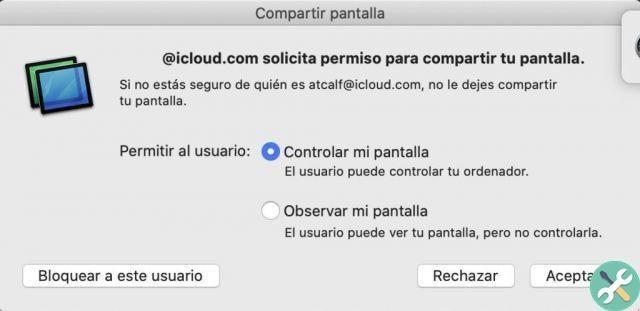
- On the next screen, you will be asked if you want the remote user to control the screen or just watch. Select the option you want and Accept.
View screen sharing remotely using Messages
Both the sender and the recipient can initiate screen sharing, but with some differences.
How to ask other users to share your screen using macOS messages

- apri Messages on the Mac.
- Select the conversazione with the person you want to share your screen with. If you haven't had a conversation until then, send him a message to start one.
- From the main menu, select conversations and then invite them to Screen sharing.
- Alternatively, you can click the button Details in the conversation and select Share and then Share my screen.
- Screen sharing and audio calling will start automatically once the remote user has it accepted the invitation.
If the sender sends you the invitation, click Accept to start sharing.
Once sharing starts, a new screen called Screen Sharing will appear, hosting the call and displaying the sender's Desktop. There are also some options within the window that you can use.

Clicking the mouse pointer icon in the menu will send the request to the sharer to allow control of the Mac.
Clicking the remote screen will highlight items on the shared Mac, which can be useful for highlighting items in the app interface without having to take control.
If the shared computer has two (or more screens) you can choose which screen you want to see.
When you're in control of the remote Mac, you can also control the clipboard, which means you can copy and paste images and text between the two computers. This is useful to avoid having to, for example, rewrite a URL in the remote browser if you already have the link locally.
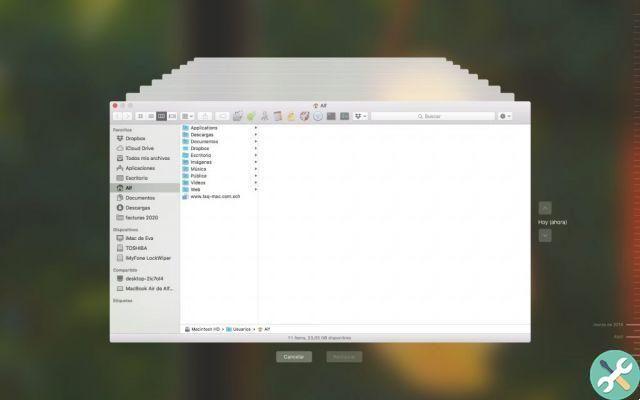
You can also transfer files from the Mac you control to the remote Mac by dragging and dropping on the window.
How to end screen sharing session in macOS Messages

- On the Mac that is sharing your screen, click the Share button in the menu bar and select " End screen sharing ". You can also stop sharing your screen if you wish to stop the sharing for a few moments.
- The Mac you are controlling remotely can do the same by selecting Stop sharing screen from menu Screen sharing.
Other things you should know about screen sharing
If it doesn't work the first time, there are a few things to check:
First, make sure the Mac you want to share is connected to iCloud on the Mac using the same Apple ID they use for messages. If they use different Apple IDs, add both Apple IDs to the same contact in Contacts and try again.
Also, make sure they are not limited by Airtime. If either party has enabled it and the initial communication cannot be initiated in Messages, this may prevent Screen Sharing from working properly.
If you've taught someone to use screen sharing and they've sent you too many invitations, you can block the user. In the invitation, hold your mouse over the Decline button, click the down arrow and select Block User.
Bonus
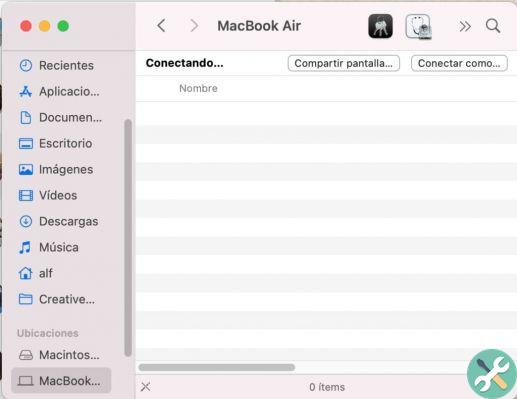
While Messages works regardless of whether the Macs are remote or on the same network, if you have the Mac in another room, within the same network, you can initiate screen sharing from a Finder window.
To do this, select the Mac you want to connect to and the Share Screen button will appear in the top right corner.


![Google also wants your Apple News [Updated] [2]](/images/posts/943dc0d8f28fcc4bc16fa30ed6d71f6a-0.jpg)


![Apple Vice Presidents Talk About Development of M1 for Mac [Updated]](/images/posts/c6254b668e5b3884d6b6338ccb8a02ff-0.jpg)