Do not allow the PowerPoint presentation to be exceed the maximum size allowed for mailing or uploading to a web page or the cloud. You can reduce the size of the images on your slides and also greatly reduce the size of the presentation without affecting the quality.
How to compress a picture in PowerPoint?
The most practical way to reduce the size of a file in the application is reduce the size of the images on the slide.
- Select the image you want to compress
- Selecting the image brings up a new option on the ribbon called Tool image . Click on it and see the new options.
- Select the option Compress images.
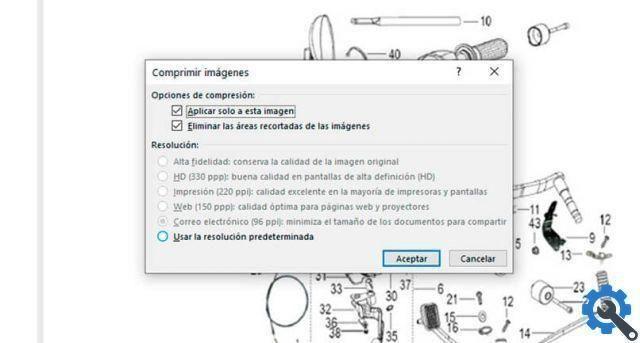
- A new window opens with options. Select the type of resolution you want apply to the image. You can choose from maximum, 330 dpi HD, 220 dpi print, 150 dpi web and 96 dpi e-mail.
- Select compression options for images. You can choose to remove cropped areas of images and if you want to apply the changes to all images or just the selected one.
- Finally, hit the Accept button to save the changes.

From the same window you can save the configuration you made as default. In case you want to do the same with other PowerPoint presentations in the future. The only problem with applying this setting is that you can't know how much the final size reduction is until you save the file again.
Final report: you can see the size of a PowerPoint file from the File menu (Alt + A) in the Info tab. The file must be saved to see the file size.
Compress a multimedia content file in PowerPoint
PowerPoint allows you to reduce the size of the multimedia content from version 2010 onwards.
- Depending on the version you are using, you can find the Compress media option in File menu on the Info tab.
- Click the button Compress media files.
- Are available three options to change the quality of the content multimedia in the presentation. The available options are: Presentation Quality, Internet Quality, and Low Quality. Select one of them.
- Editing after selecting an option is immediate and may take some time depending on the amount of media files in the presentation.

The reduction in the size of the final PowerPoint file is noticeable, but you have to take that into consideration the quality images, videos or audio it can be compromised with this process. It will depend on the quality selected.
Link multimedia and video content to your presentation
Another way to avoid overloading your presentation is to make it lighter is to add links to the files in the slides, but without embedding them. For example, if you want to link a video into a PowerPoint file:
- Create some text on the slide. It can be video so that it is related to the file we want to link.
- In the Insert menu, select the option Link-Insert Link.
- Then, in the file browser, select the video a you want to refer to in the presentation.
- To save the changes, press the Accept button.
Now when you want to access the file you just linked, click the text in the presentation and the file will open with the default application for that format.
Final report: for the file to open, it must be in the same location on the storage drive it was attached to. In case you are using the presentation on another PC, make sure to upload the multimedia file as well and verify that the link works.


