


What is a model?
One reason is none other than an image that is repeated a finite or infinite number of times without representing any crack or break in the design.

Customization of the model
As mentioned above, one of the features that most characterizes CorelDRAW (and which has also positioned it as one of the best design programs for digital content), is the ability to customize most of its tools, depending on the needs and preferences of its users.
In this sense, not only can you use the templates that CorelDRAW can offer you, but you can also create the shapes and shapes you think are necessary to develop a mosaic.
How to create a custom model
To proceed with the creating a custom card or pattern through the tools offered by CorelDRAW, you just have to follow a series of instructions that will be shown below:
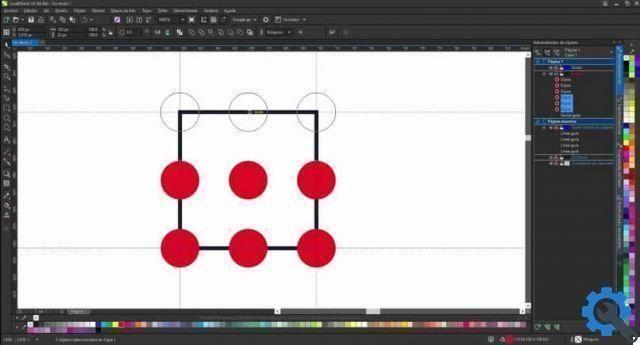
- Draw on the sheet the main figure for the design of your model.
- Use the "Shape Properties" box to set equal measurements. For example: 10cm in length and 10cm in width.
- Align the figure so that it is in the ideal position relative to the sheet. To do this, go to object card, go to the “Align and distribute” section and click on the option of the same name.
- A toolbar will appear next to your screen through which you can perform horizontal and vertical alignment to make sure it is perfectly centered on the sheet.
Define your layout
This figure will form the background of your motif, so you have to give it a background and start drawing the rest of the figures that will be part of it. To do this, you need to:
- Define the background color of your pattern, using the CorelDRAW color palette or another palette created earlier.
- Use the corners (if you are using, for example, a square) of the figure that serves as the background of the pattern to position the rest of the figures. The guidelines will be very helpful for this.
- You can click on the horizontal ruler that appears on the screen and drag it to the sheet, then add the remaining lines around the figure.
- Draw the shape that will form the pattern. It is important that, using the shape properties tool, you set the measurements equal to and smaller than the shape serving as the background. That is to say: if you previously used a figure with measures of 10 × 10, you can assign the new figure, measures of 5 × 5.
- Duplicate the shape and place it in each corner of the box.
Save the created template
Once you are done drawing and aligning the figures that will form the pattern, you can add the effects you want . What remains to be done is to create and save the model. To do this, follow the steps below:
- Go to the "Tools" tab on the ribbon. Go to the “Create” section and click on “Pattern Fill”.
- Select the type of motif you prefer.
- It is recommended to select only the central area of the drawing. Hence also the importance of the guiding rules in the design process.
- Click the "OK" button and a new window will appear where you can assign name, tags and category.
Using the custom template
In this way, taking the design out of the box (place it on the same sheet or on a new one), the pattern you just created. As? As follows:
- Draw one new form.
- Go to the “Interactive Fill” option.
- Click the 'Vector Template' button.
- Select the category " Staff ".
- Select the template created.
- Adjust the its size according to your design preferences.


